Plans
This guide supports users in using “Plans” to set up multi-channel marketing campaigns with uSpeedo AI. “Plans” allows uSpeedo AI to generate customized copy, images, schedules, and target groups across multi-channel according to user specifications.
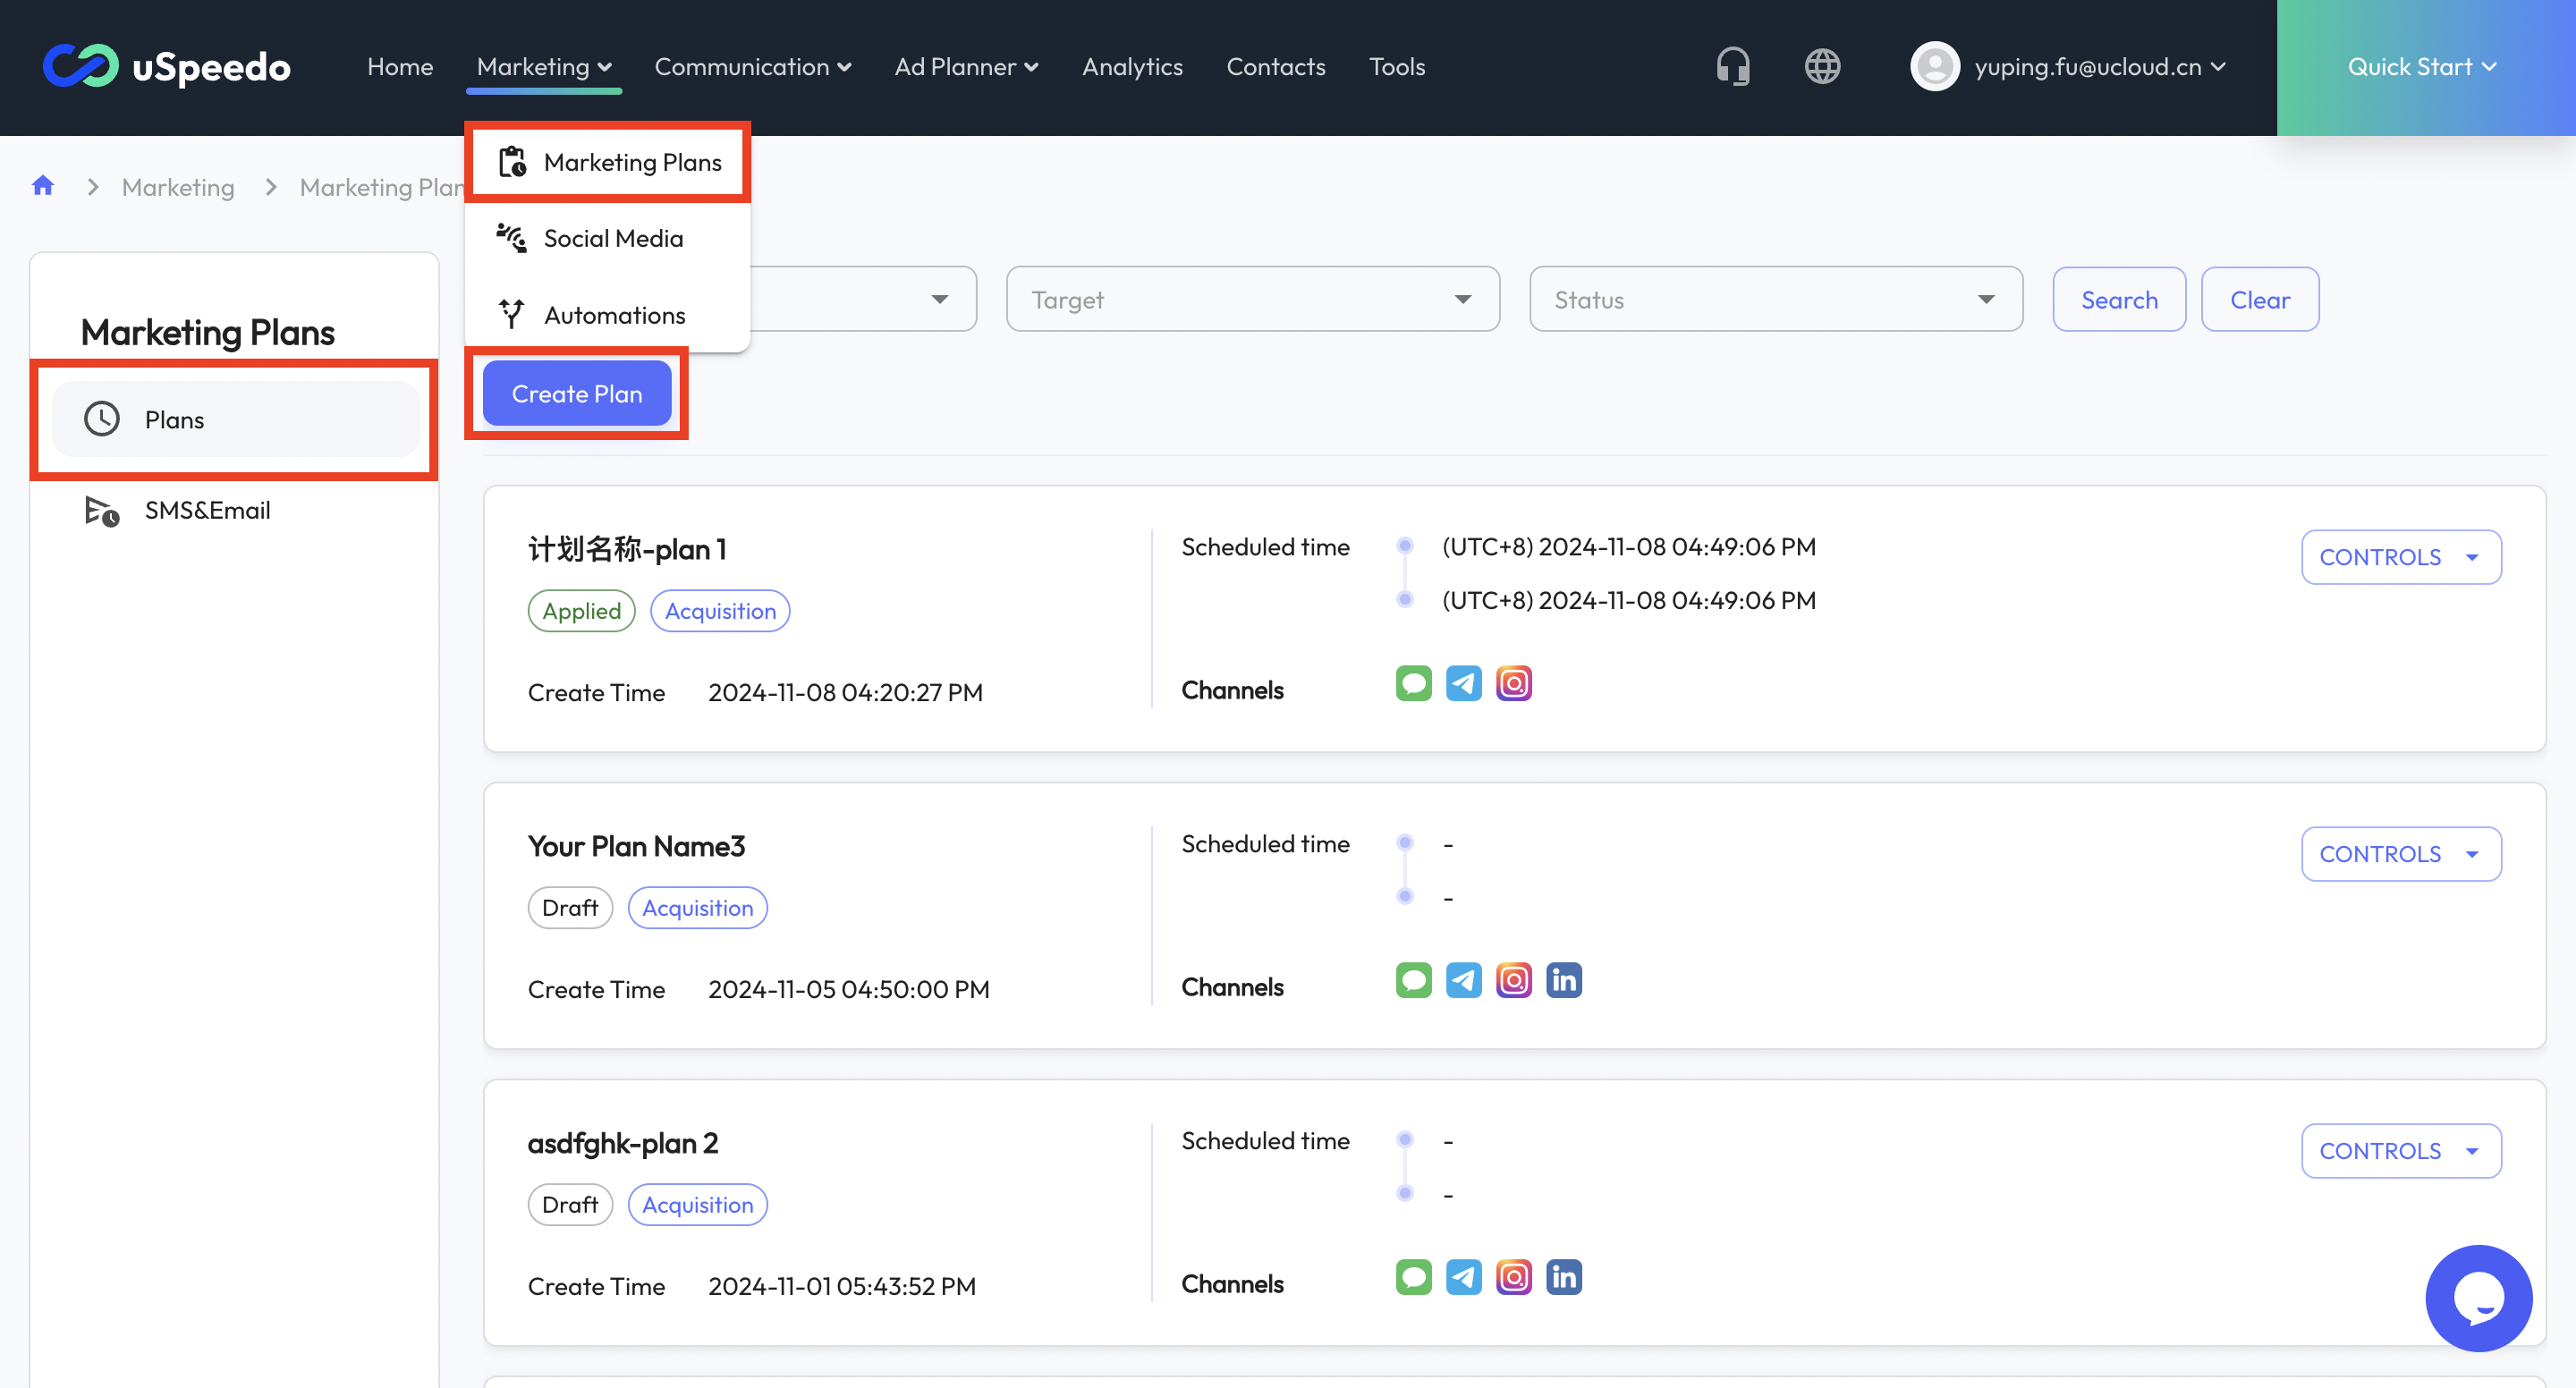
Before starting, confirm you are logged into an active uSpeedo account. Access Plans from the navigation bar.
Guide Overview
1. Create a New Plan
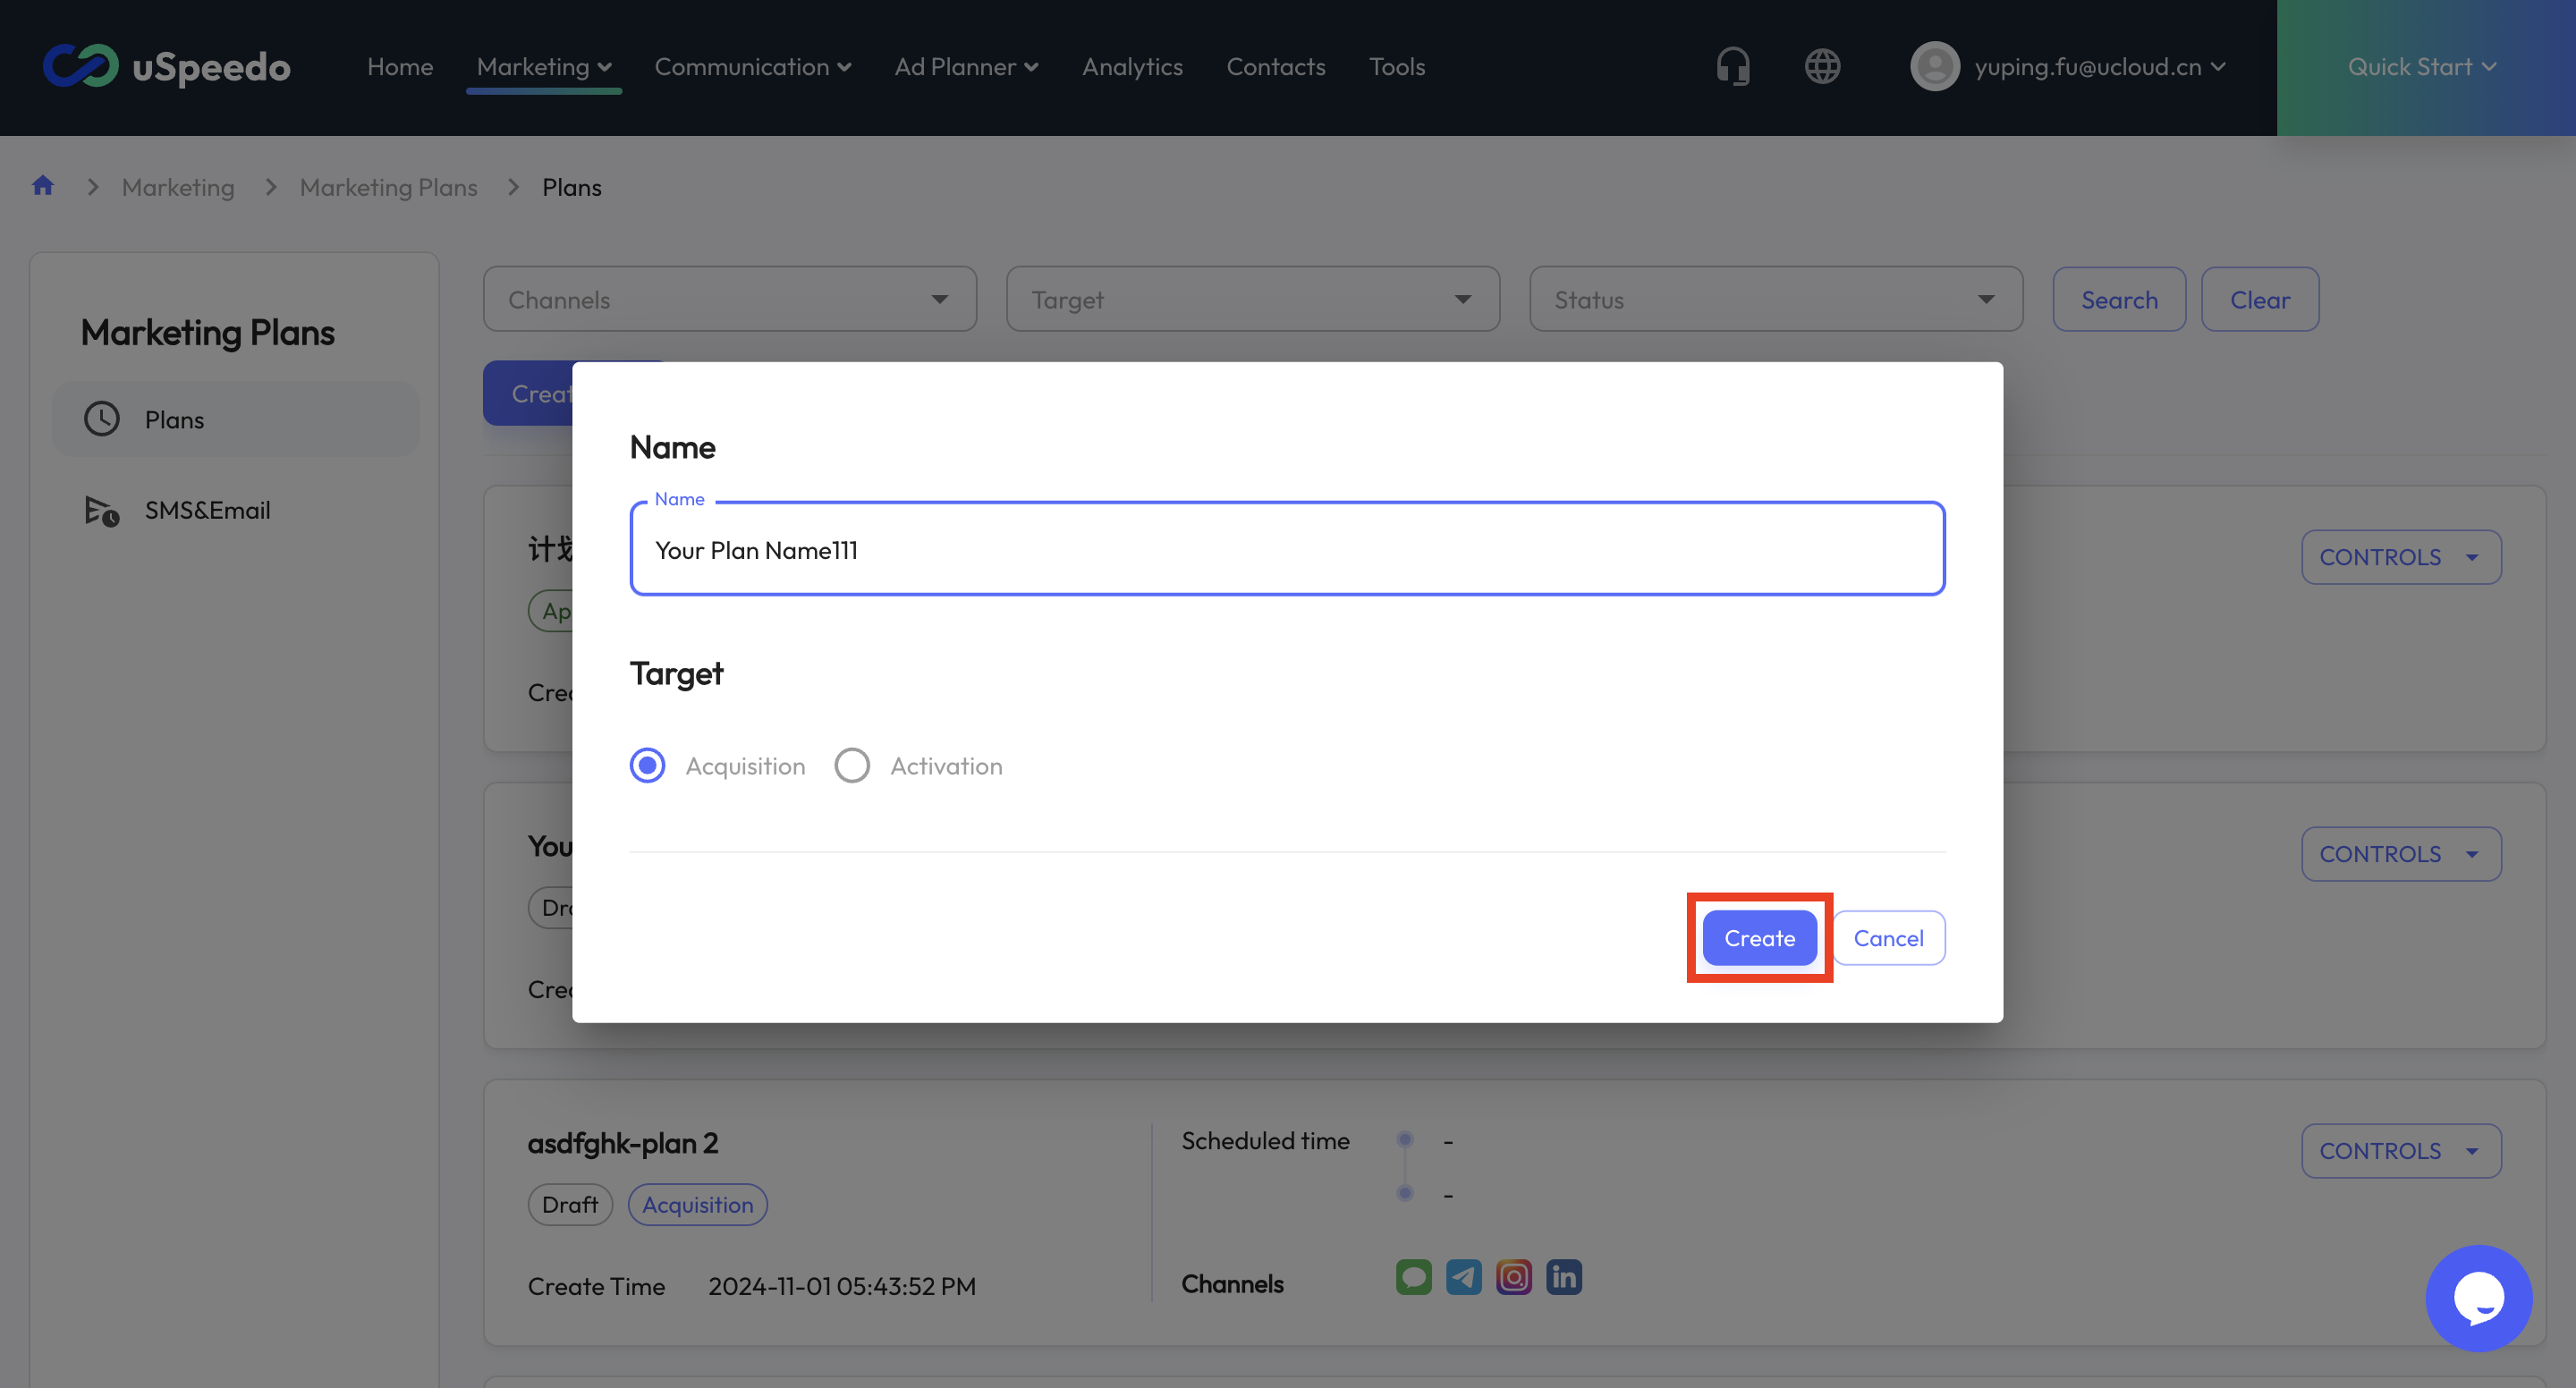
- Click on “Create Plan” to start a new plan. Enter basic information about the plan in the pop-up:
- Name: Enter a custom name for your new plan.
- Target: Choose either “Acquisition” or “Activation” based on your marketing objectives.
- Click “Create” to complete the basic settings and move to the next step.
2. Define Marketing Channels and Preferences
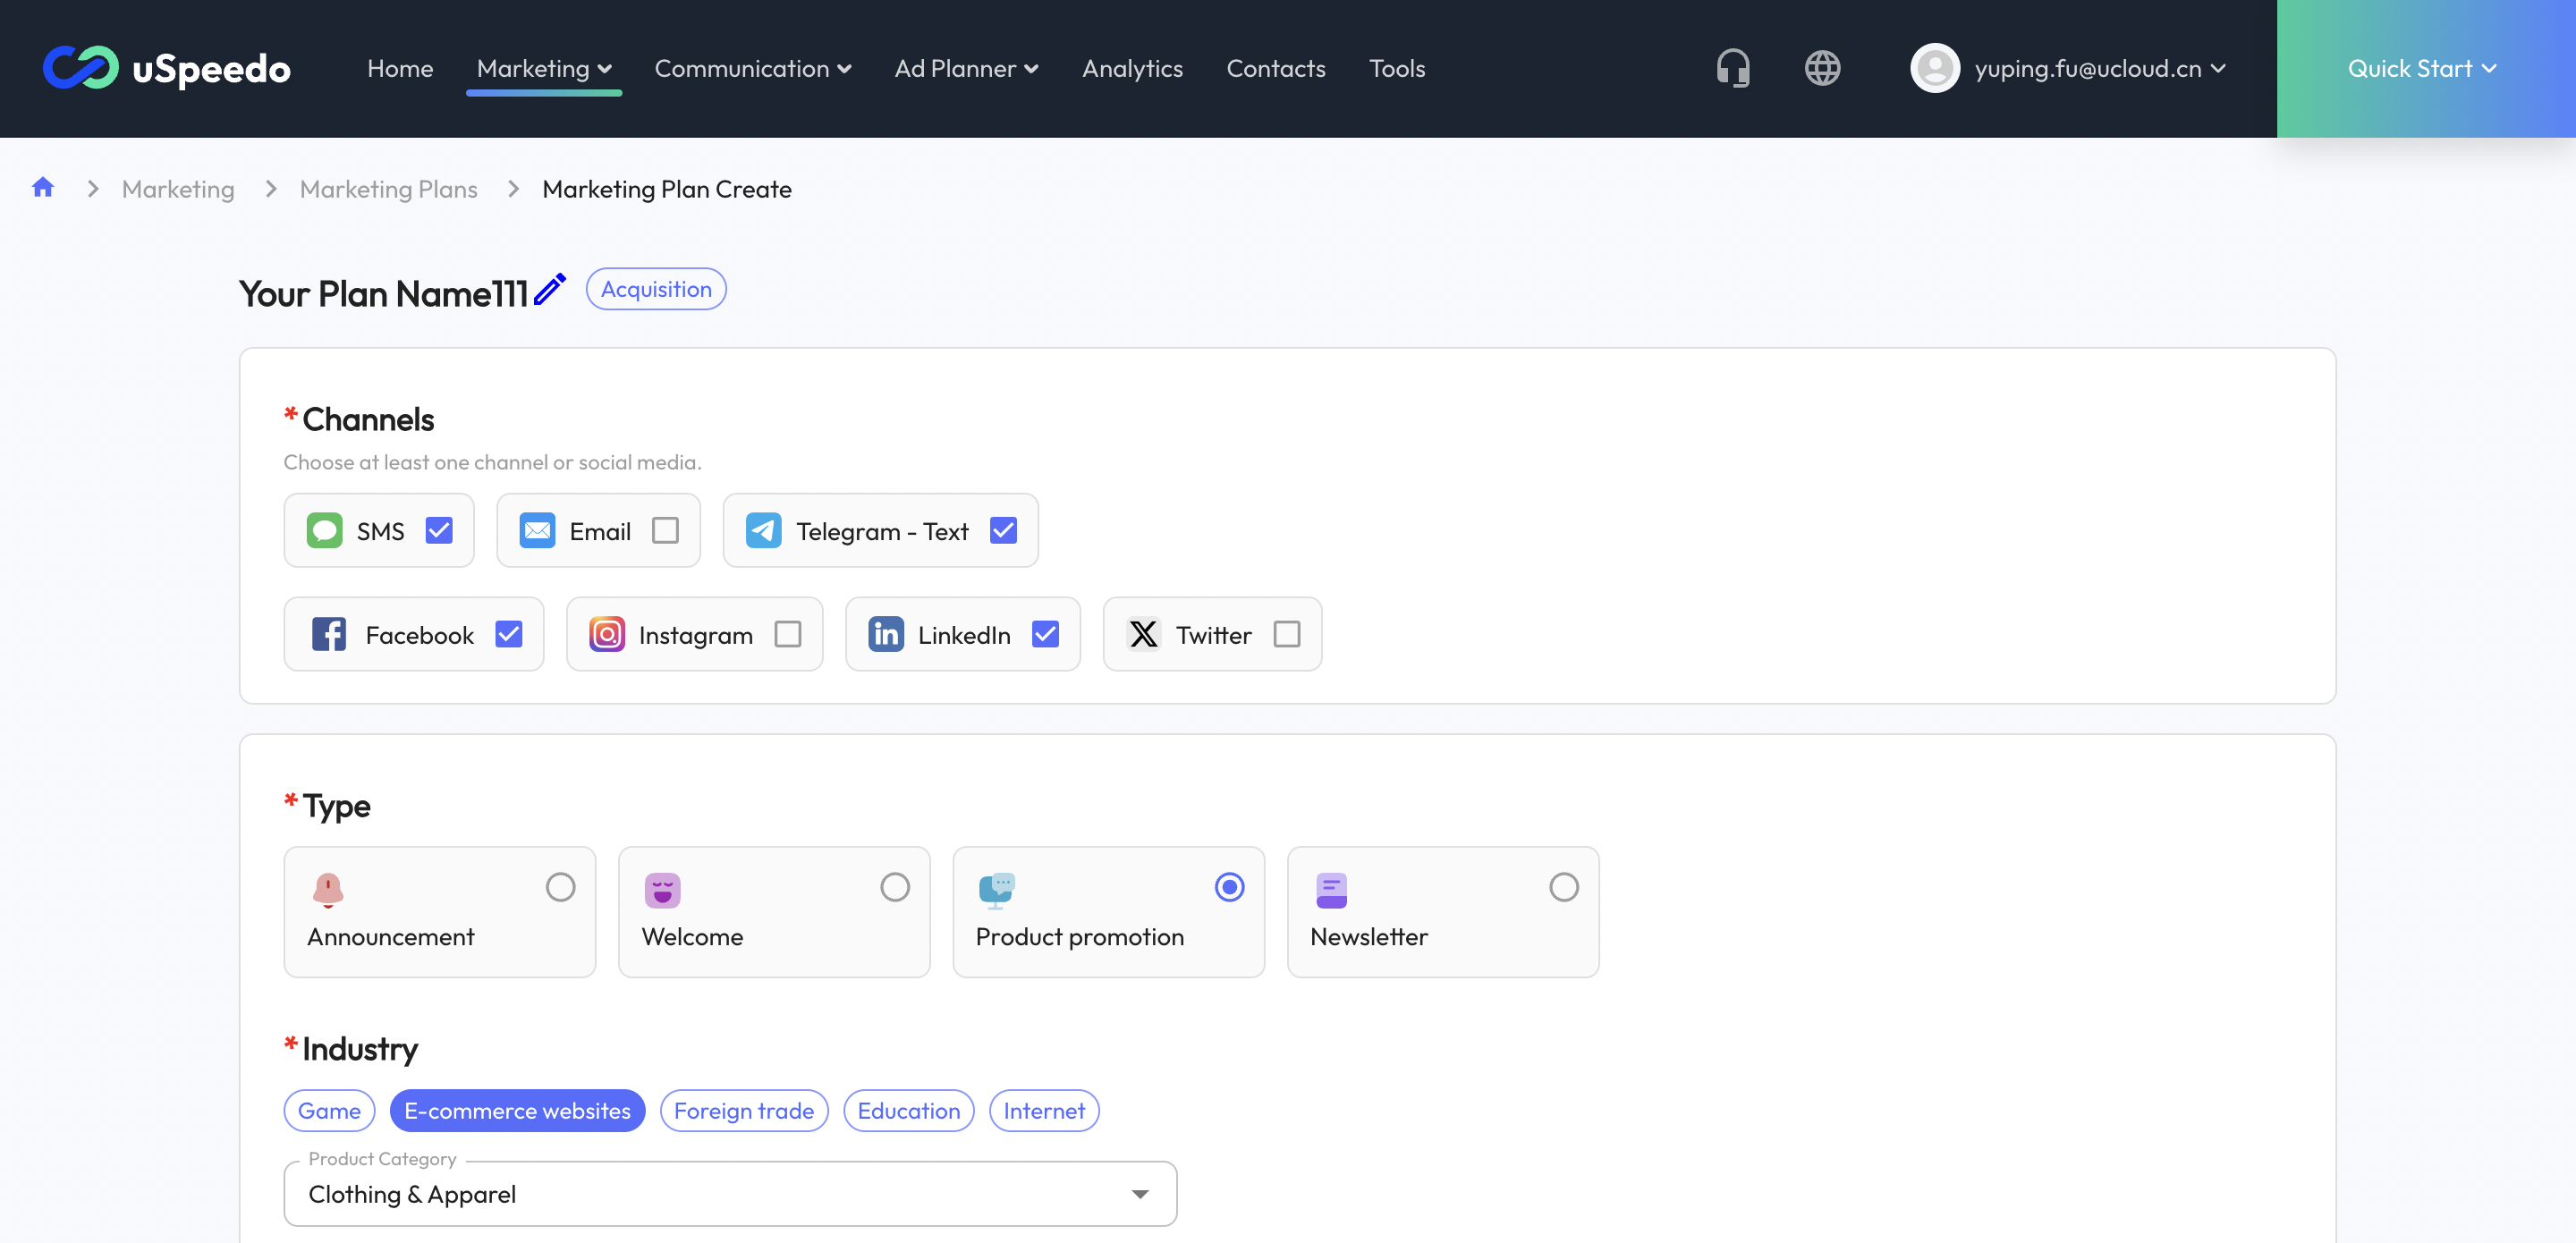
- Channels: Choose the marketing channels individually or in combination.
- Type: Define the nature of the marketing activity.
- Industry: Select the industry and category for your marketing content.
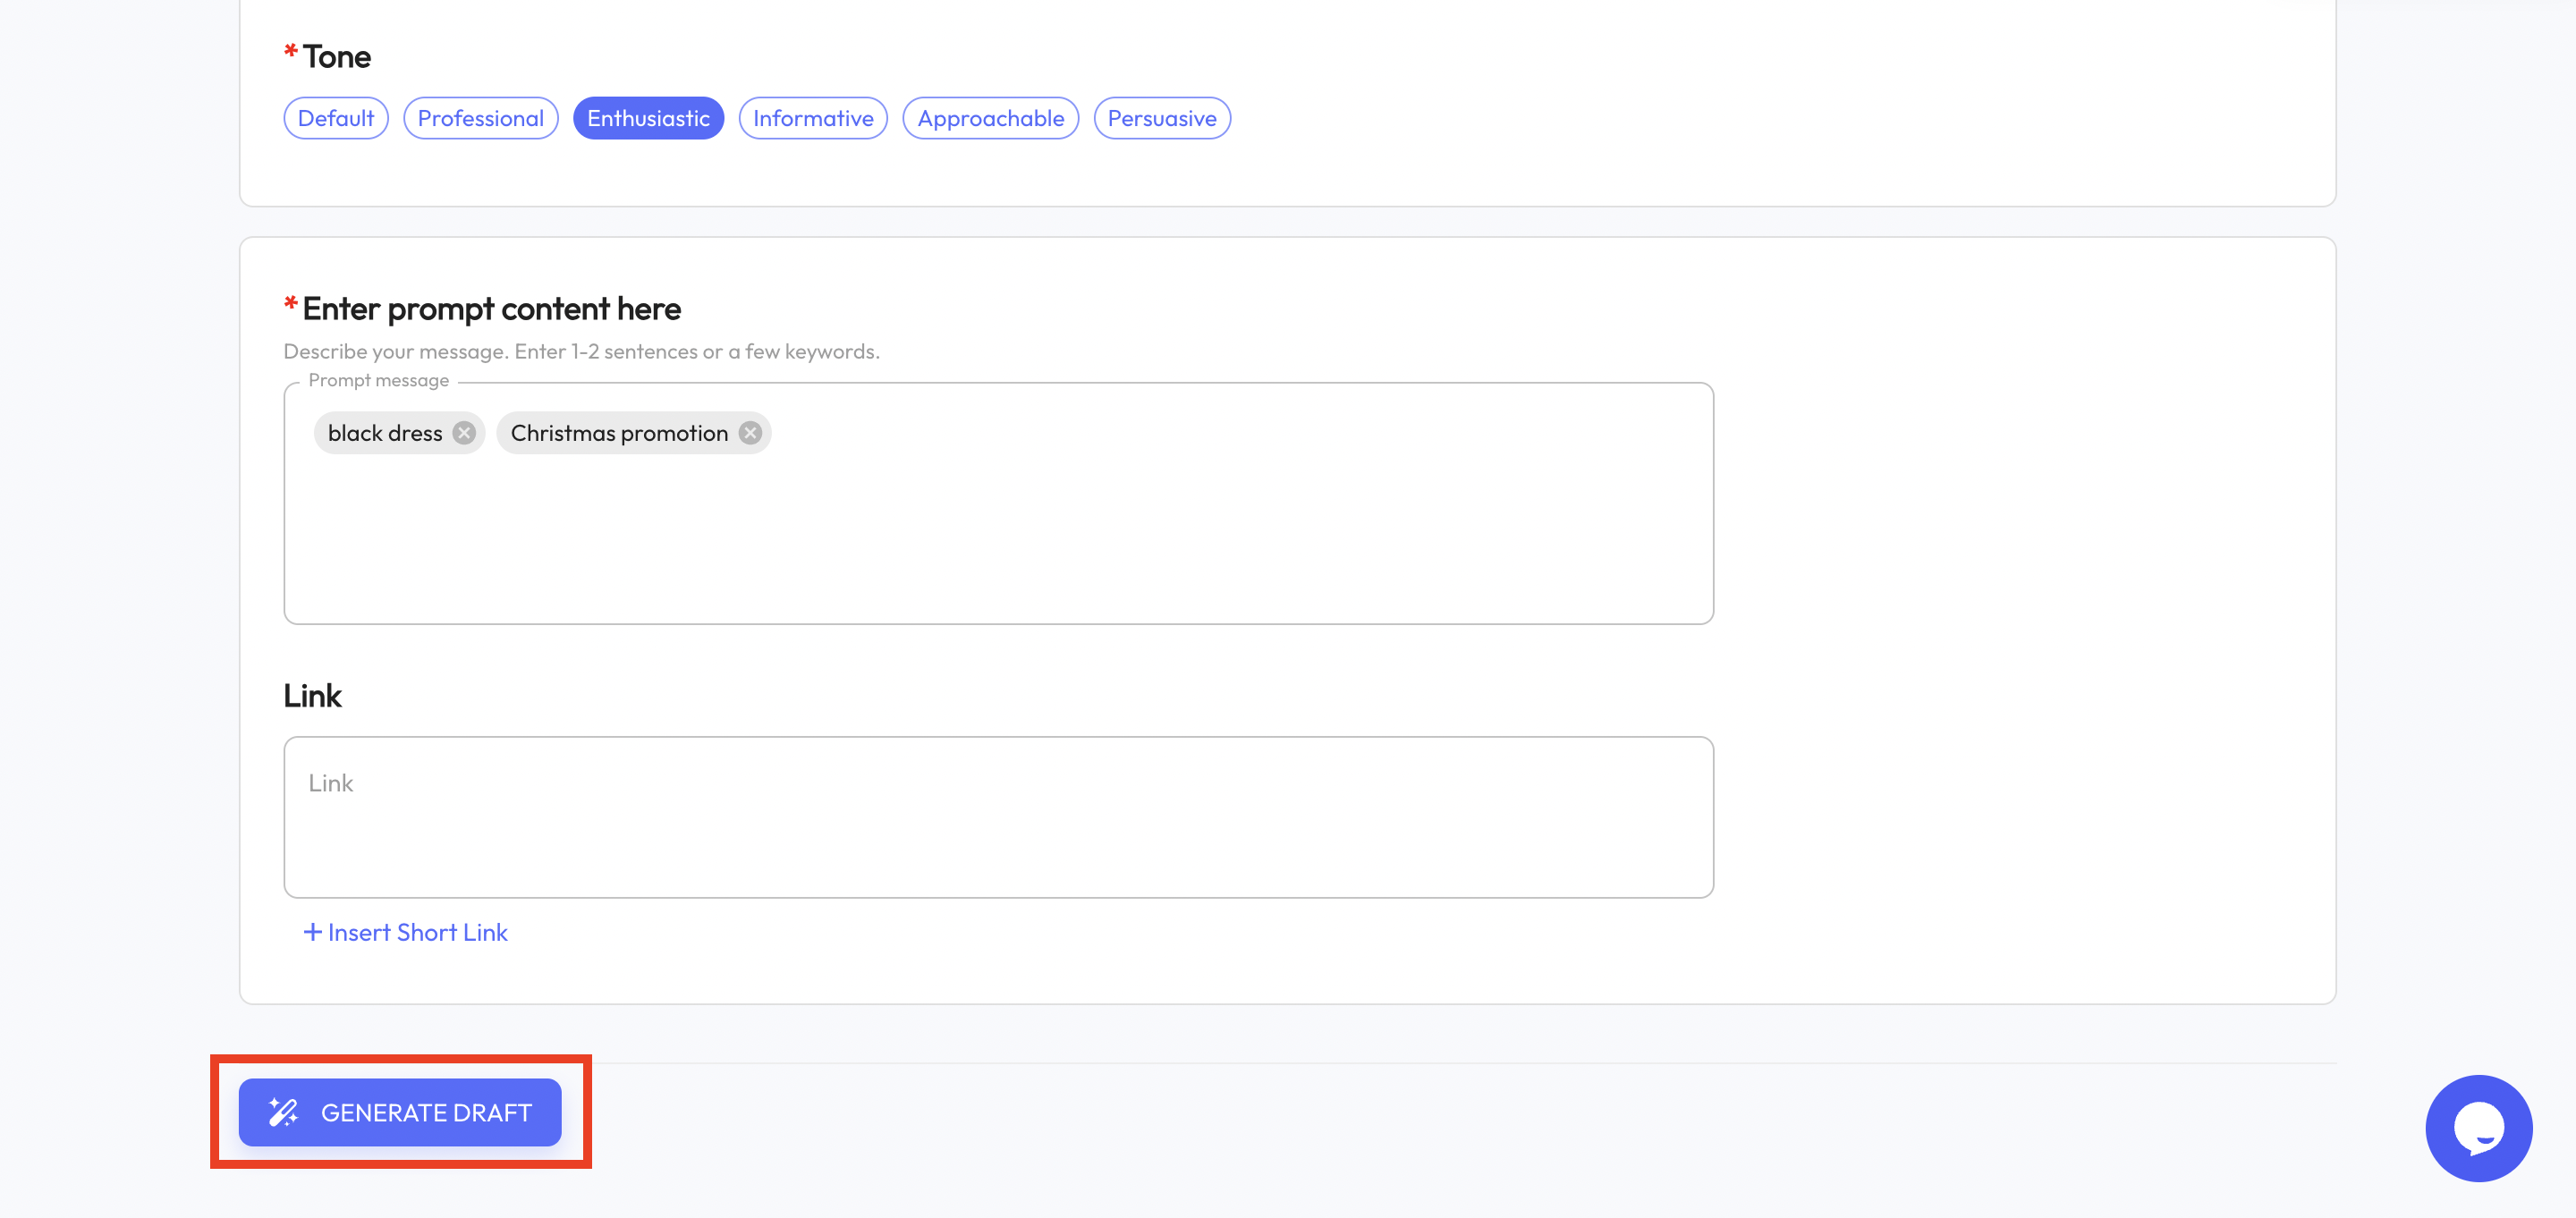
- Tone: Choose the style of tone for your marketing copy.
- Prompt: Enter relevant keywords that should be highlighted in your marketing content.
- Link: Insert necessary links, which might be product purchase links or official website links.
- After filling all required fields, click the “GENERATE DRAFT” button at the bottom of the page to proceed to the next step.
3. Review AI-Generated Plans
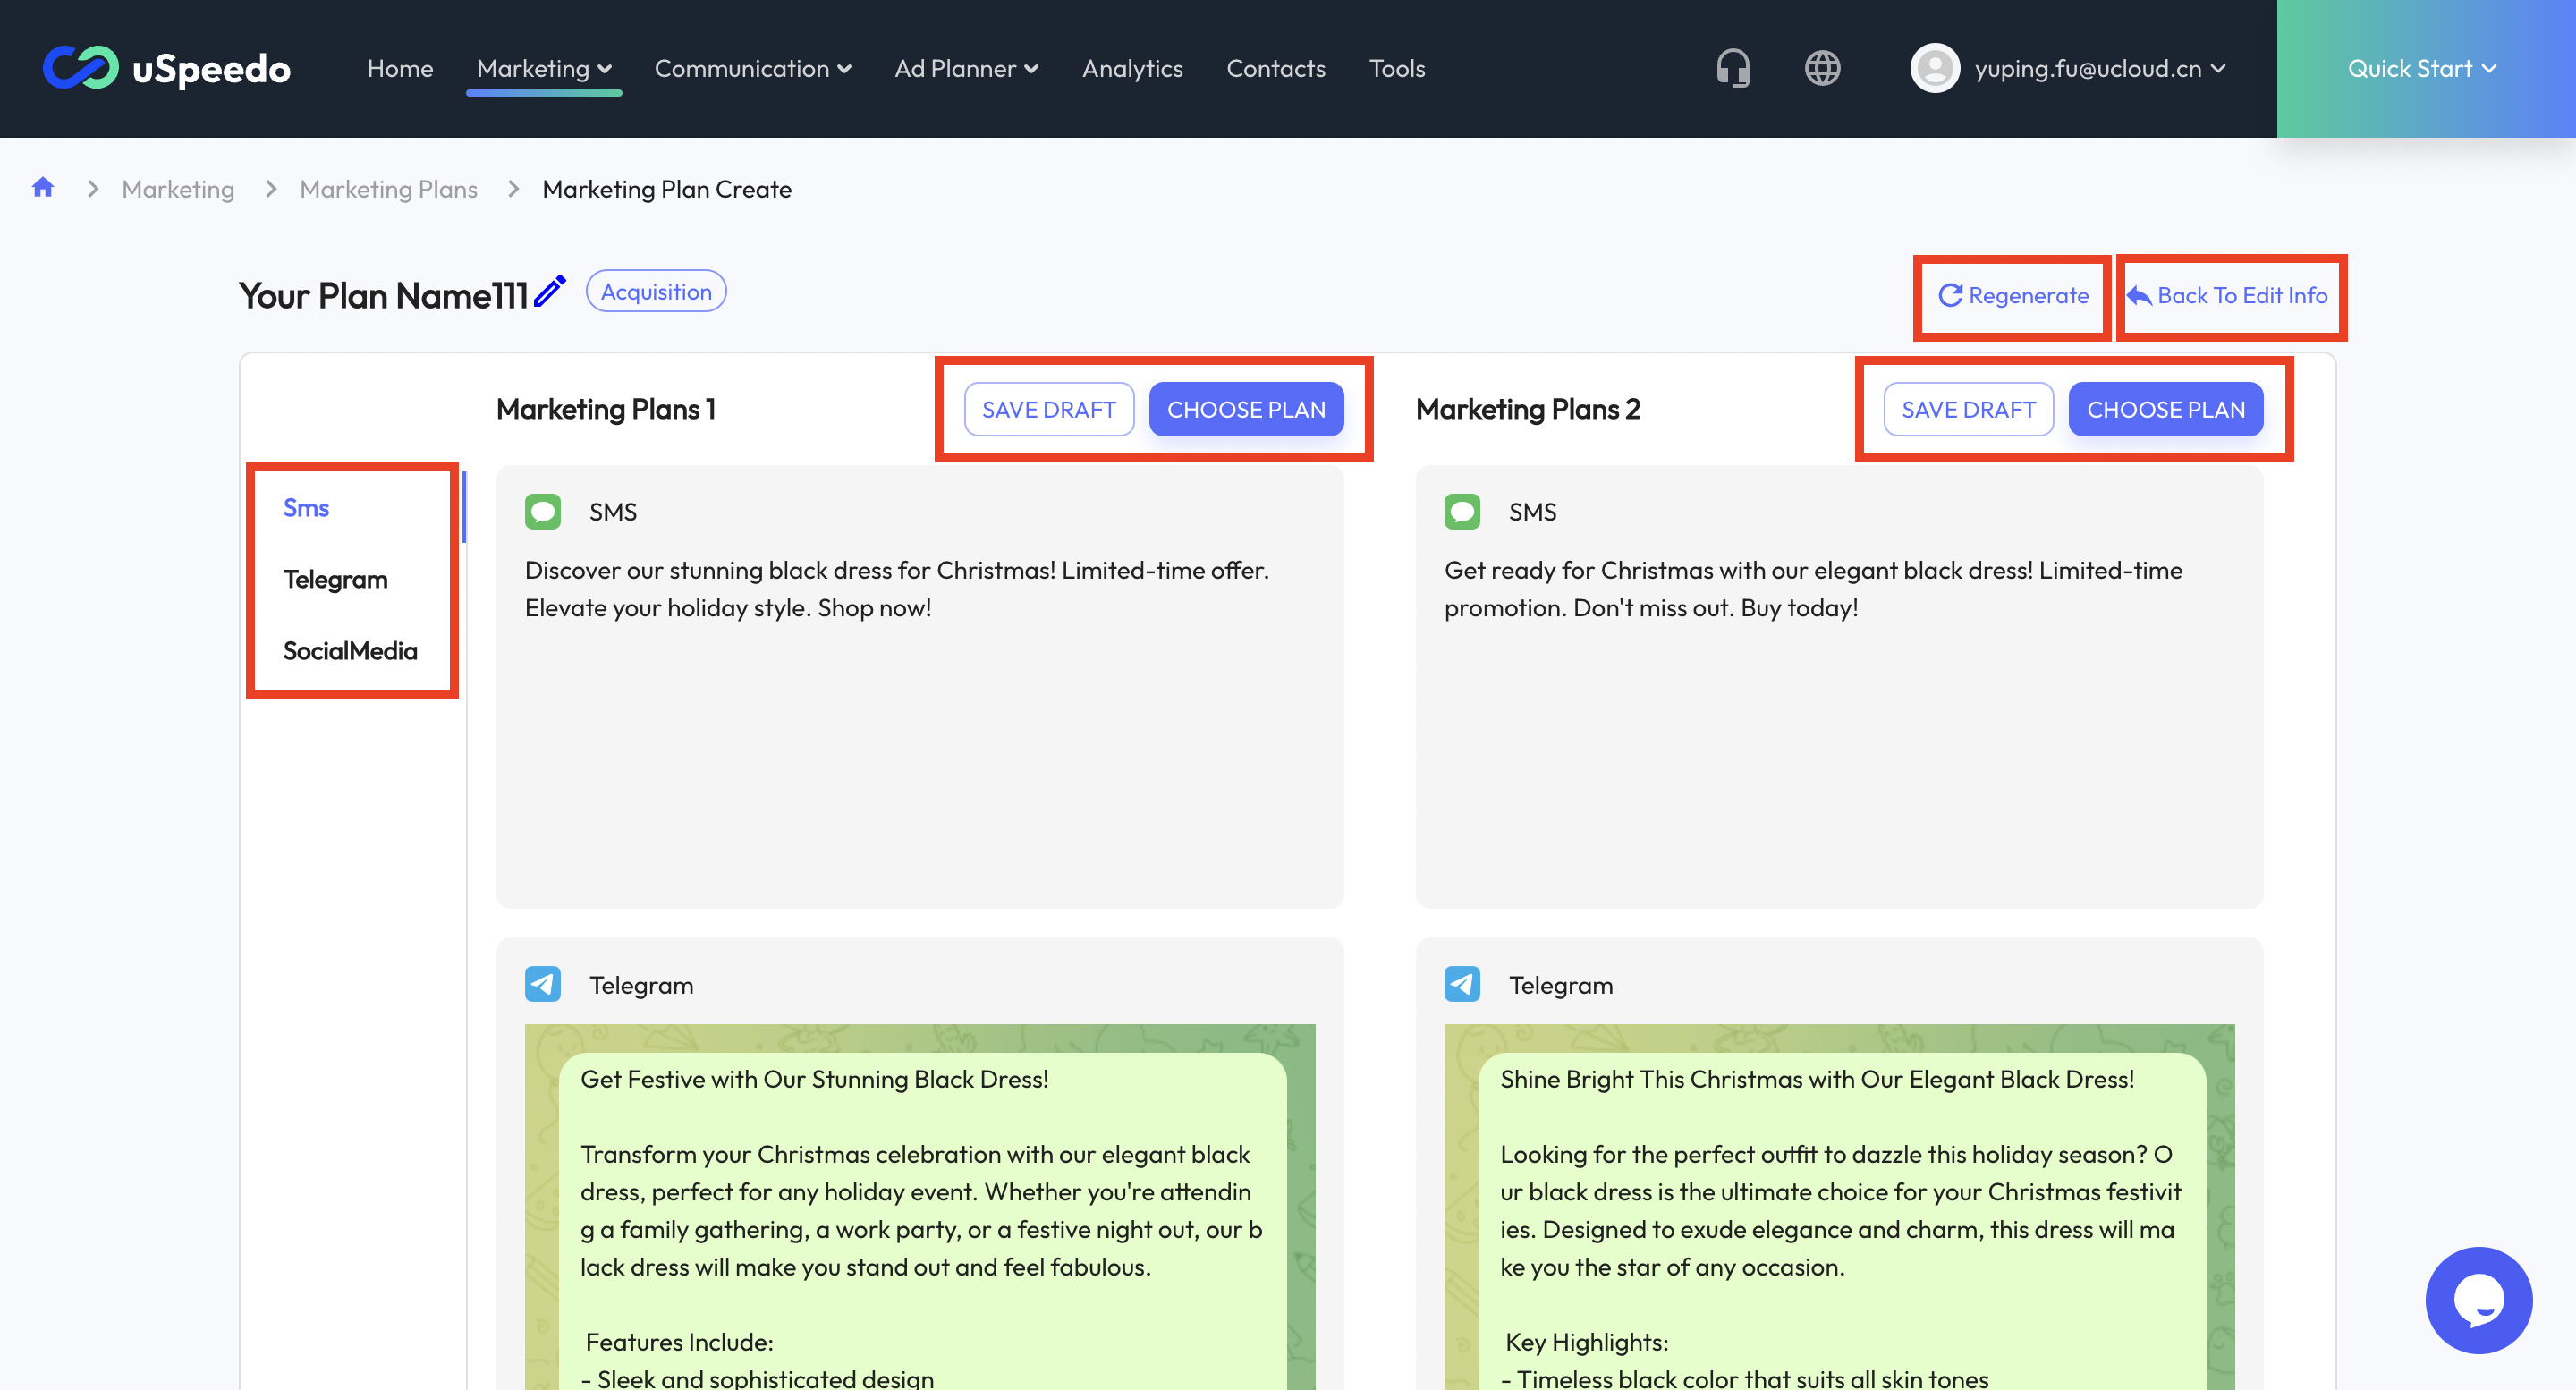
- uSpeedo AI will generate two different versions of your marketing plan based on the provided key details:
- Review each plan, including copy, images, schedule, and target audiences.
- Scroll down to view channel details, with left-side tabs to navigate between sections.
- Click “Regenerate” in the top-right corner to generate two new marketing plans, or click “Back To Edit Info” to return to the previous step.
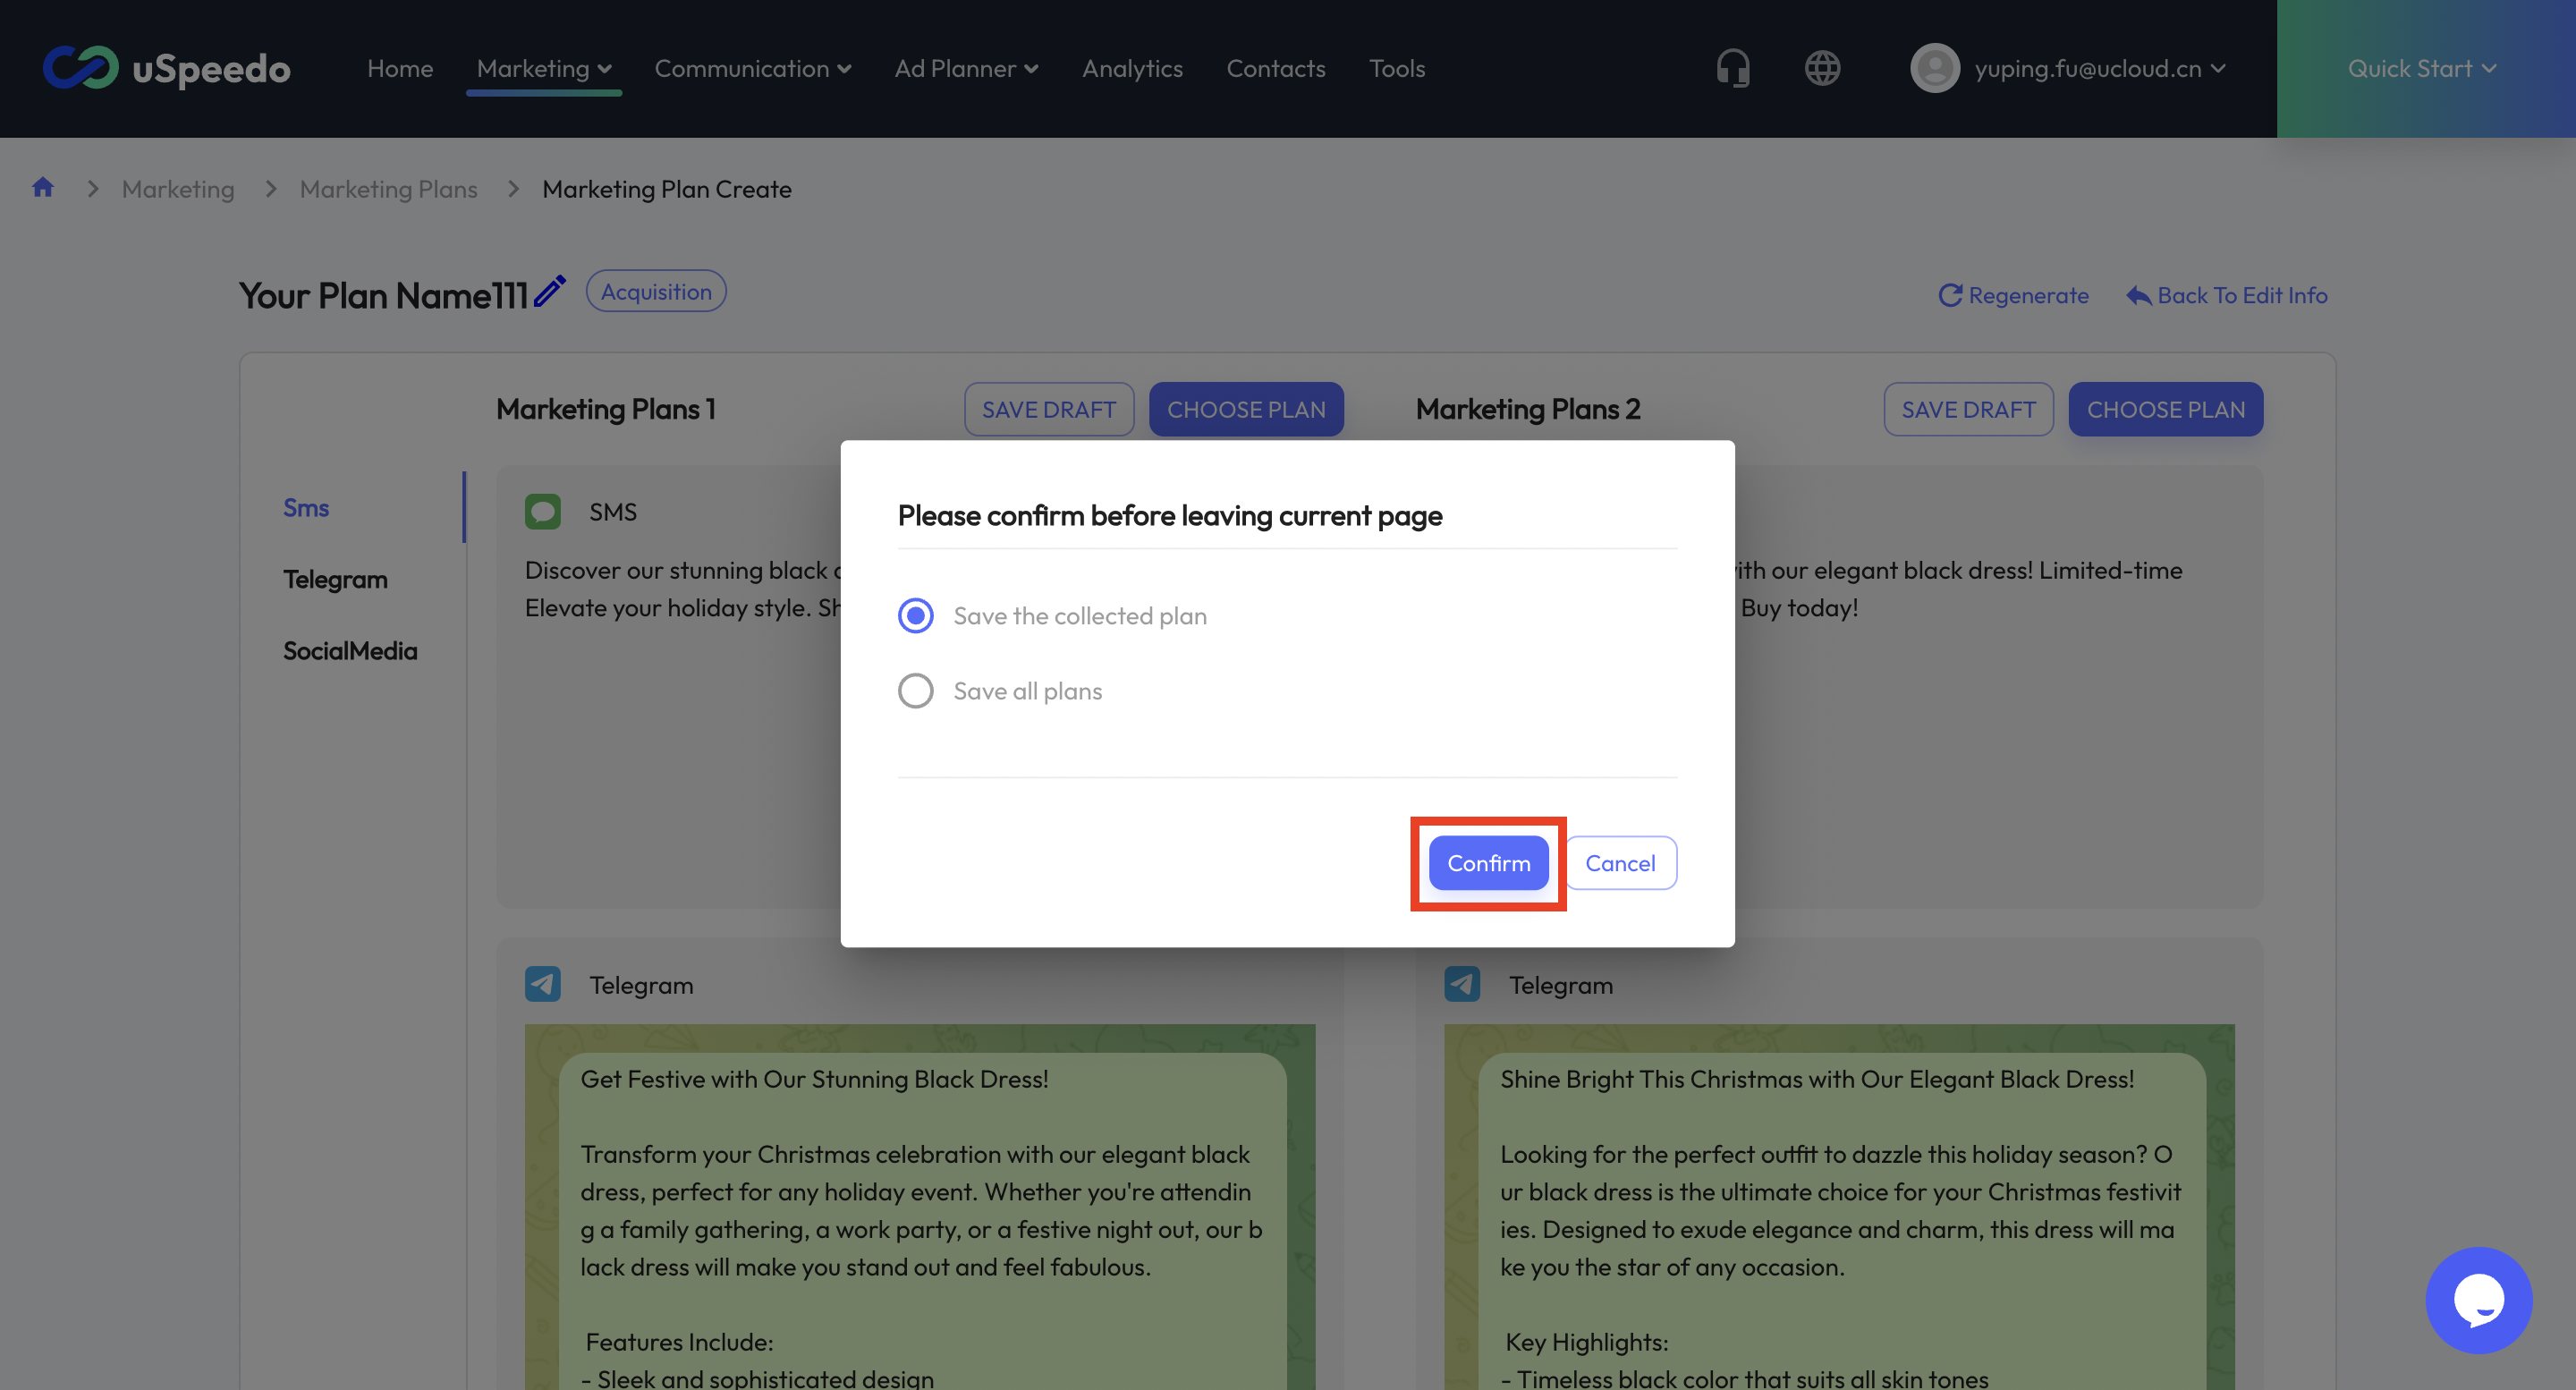
- Click “CHOOSE PLAN” to open a pop-up:
- Choose “Save the collected plan” or “Save all plans” based on your needs.
- Click “Confirm” to proceed.
- Click “SAVE DRAFT” to save a single plan or all plans. Saved plans can be accessed and edited later from your plan list.
4. Edit and Apply Plans
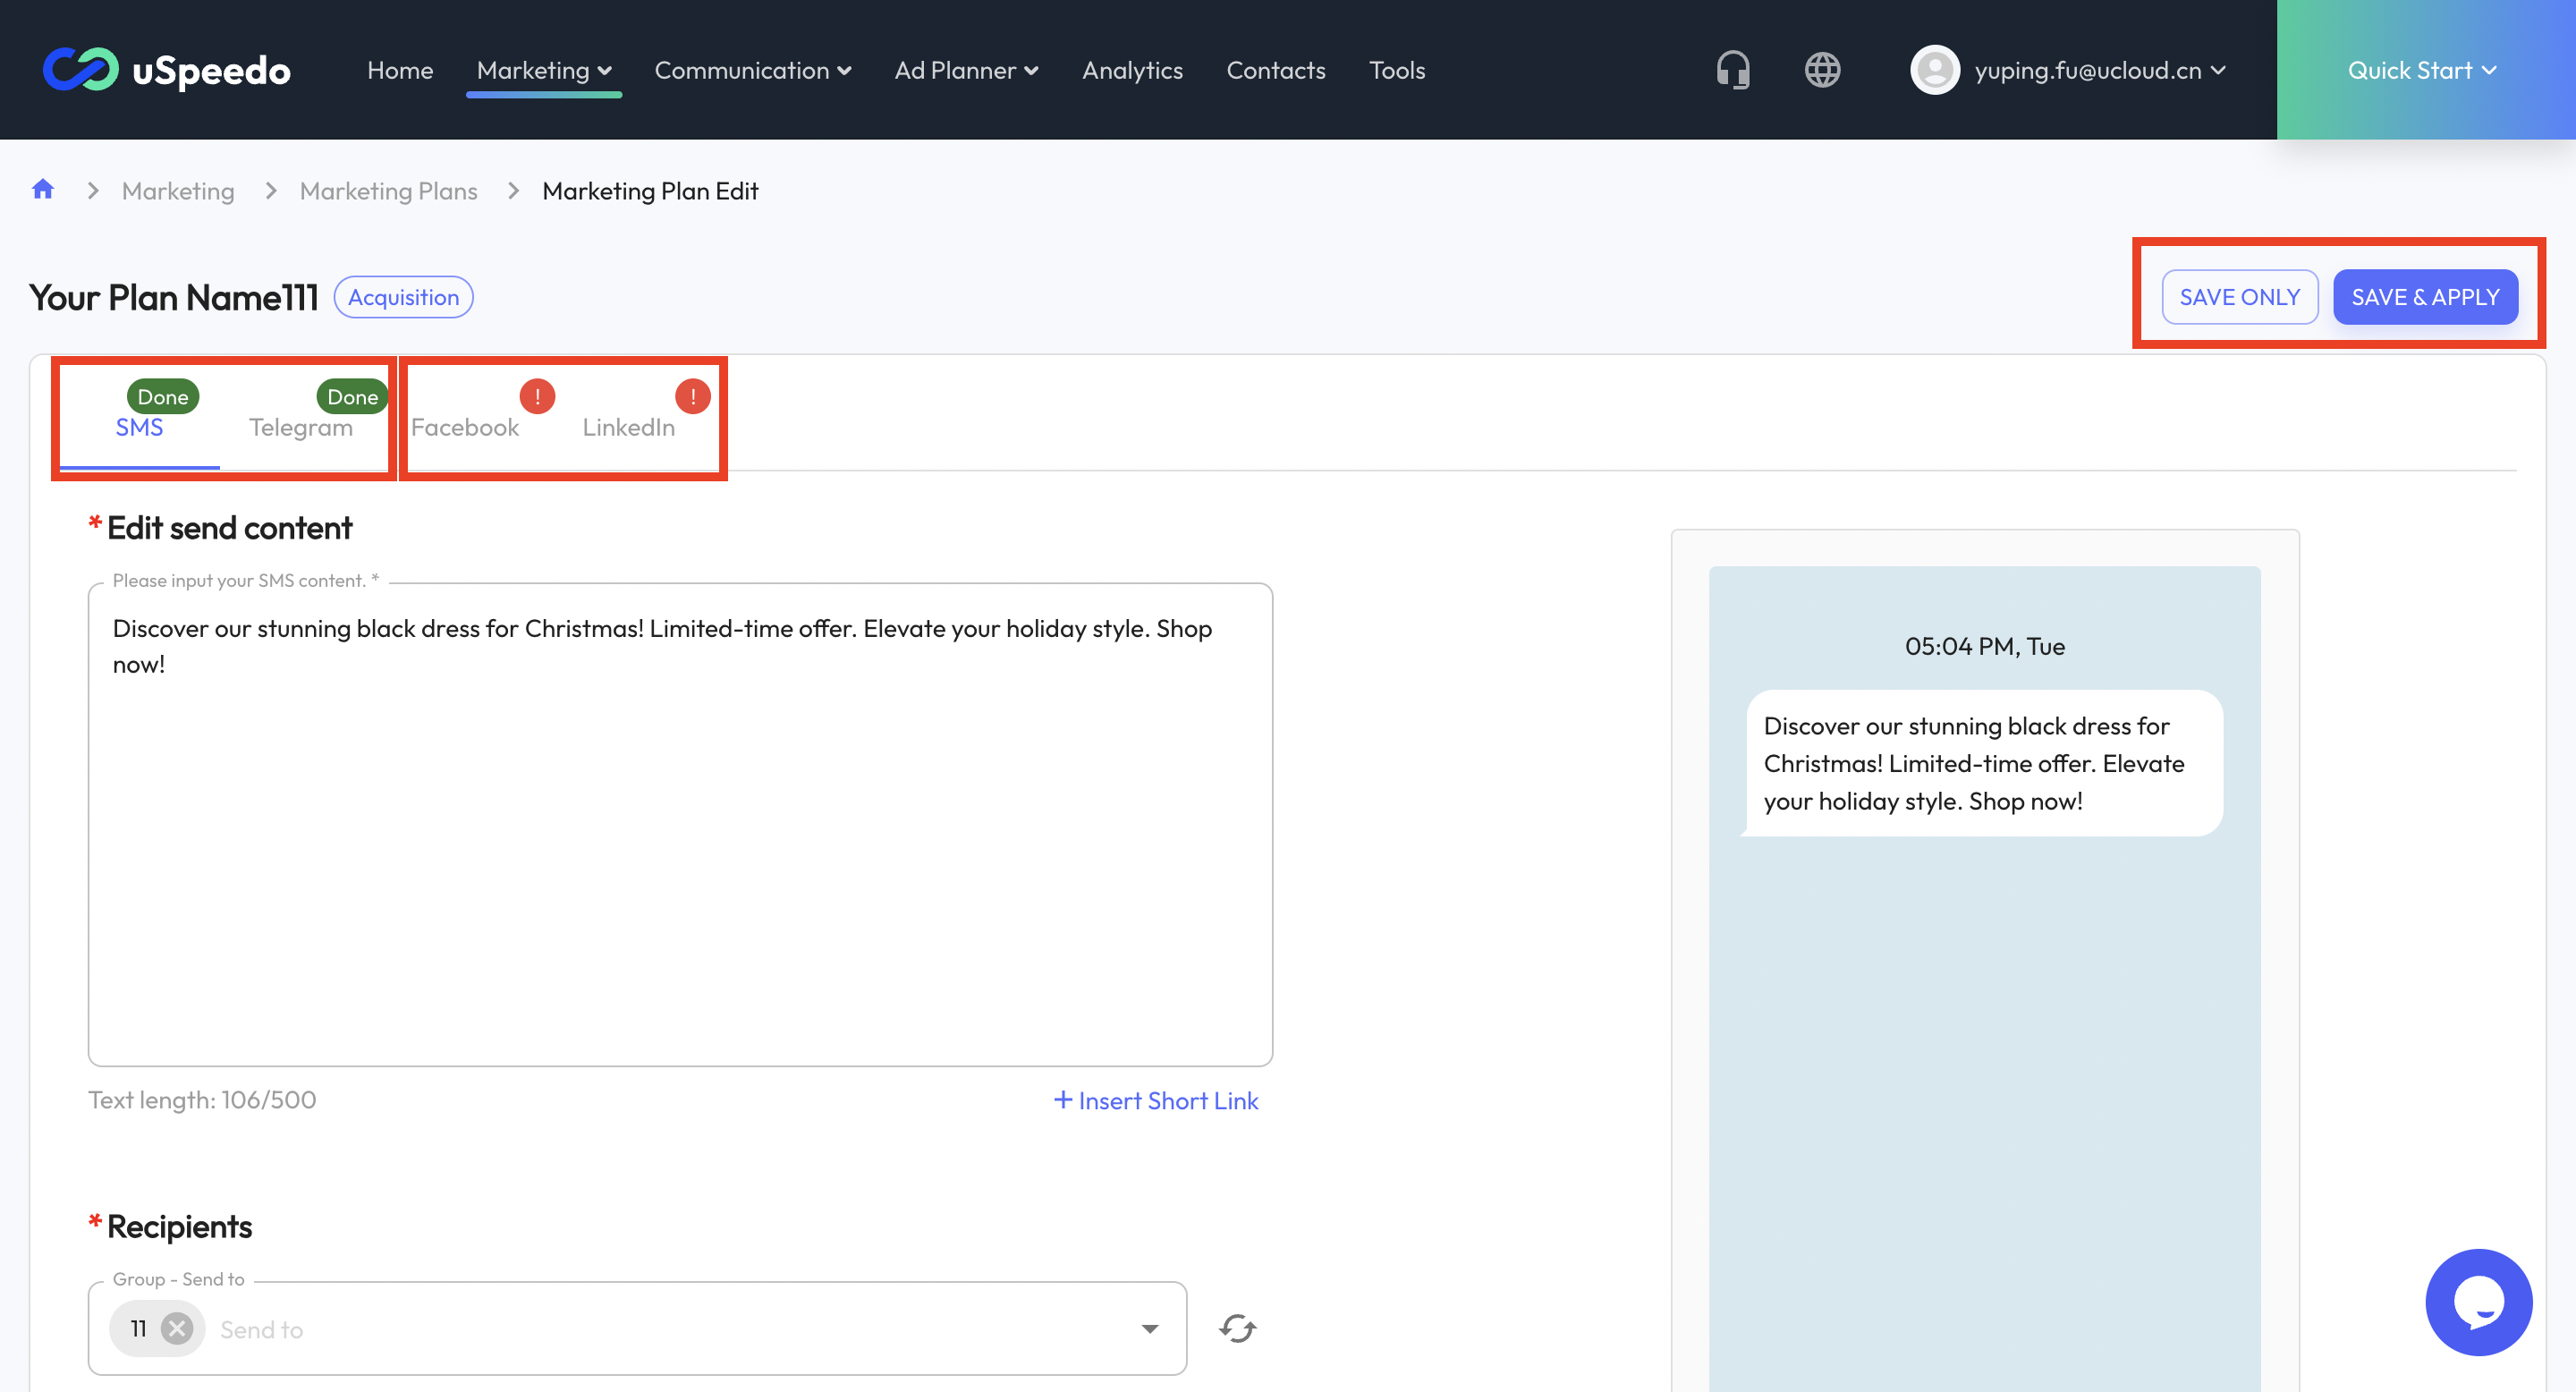
- The tabs display all generated plans by channel. Fill in the required fields or customize the generated details (e.g., copy, images, etc.).
- Fields marked with a red asterisk are mandatory.
- A red exclamation mark next to a channel indicates incomplete mandatory fields. Once all required fields are filled correctly, a green “Done” mark will appear.
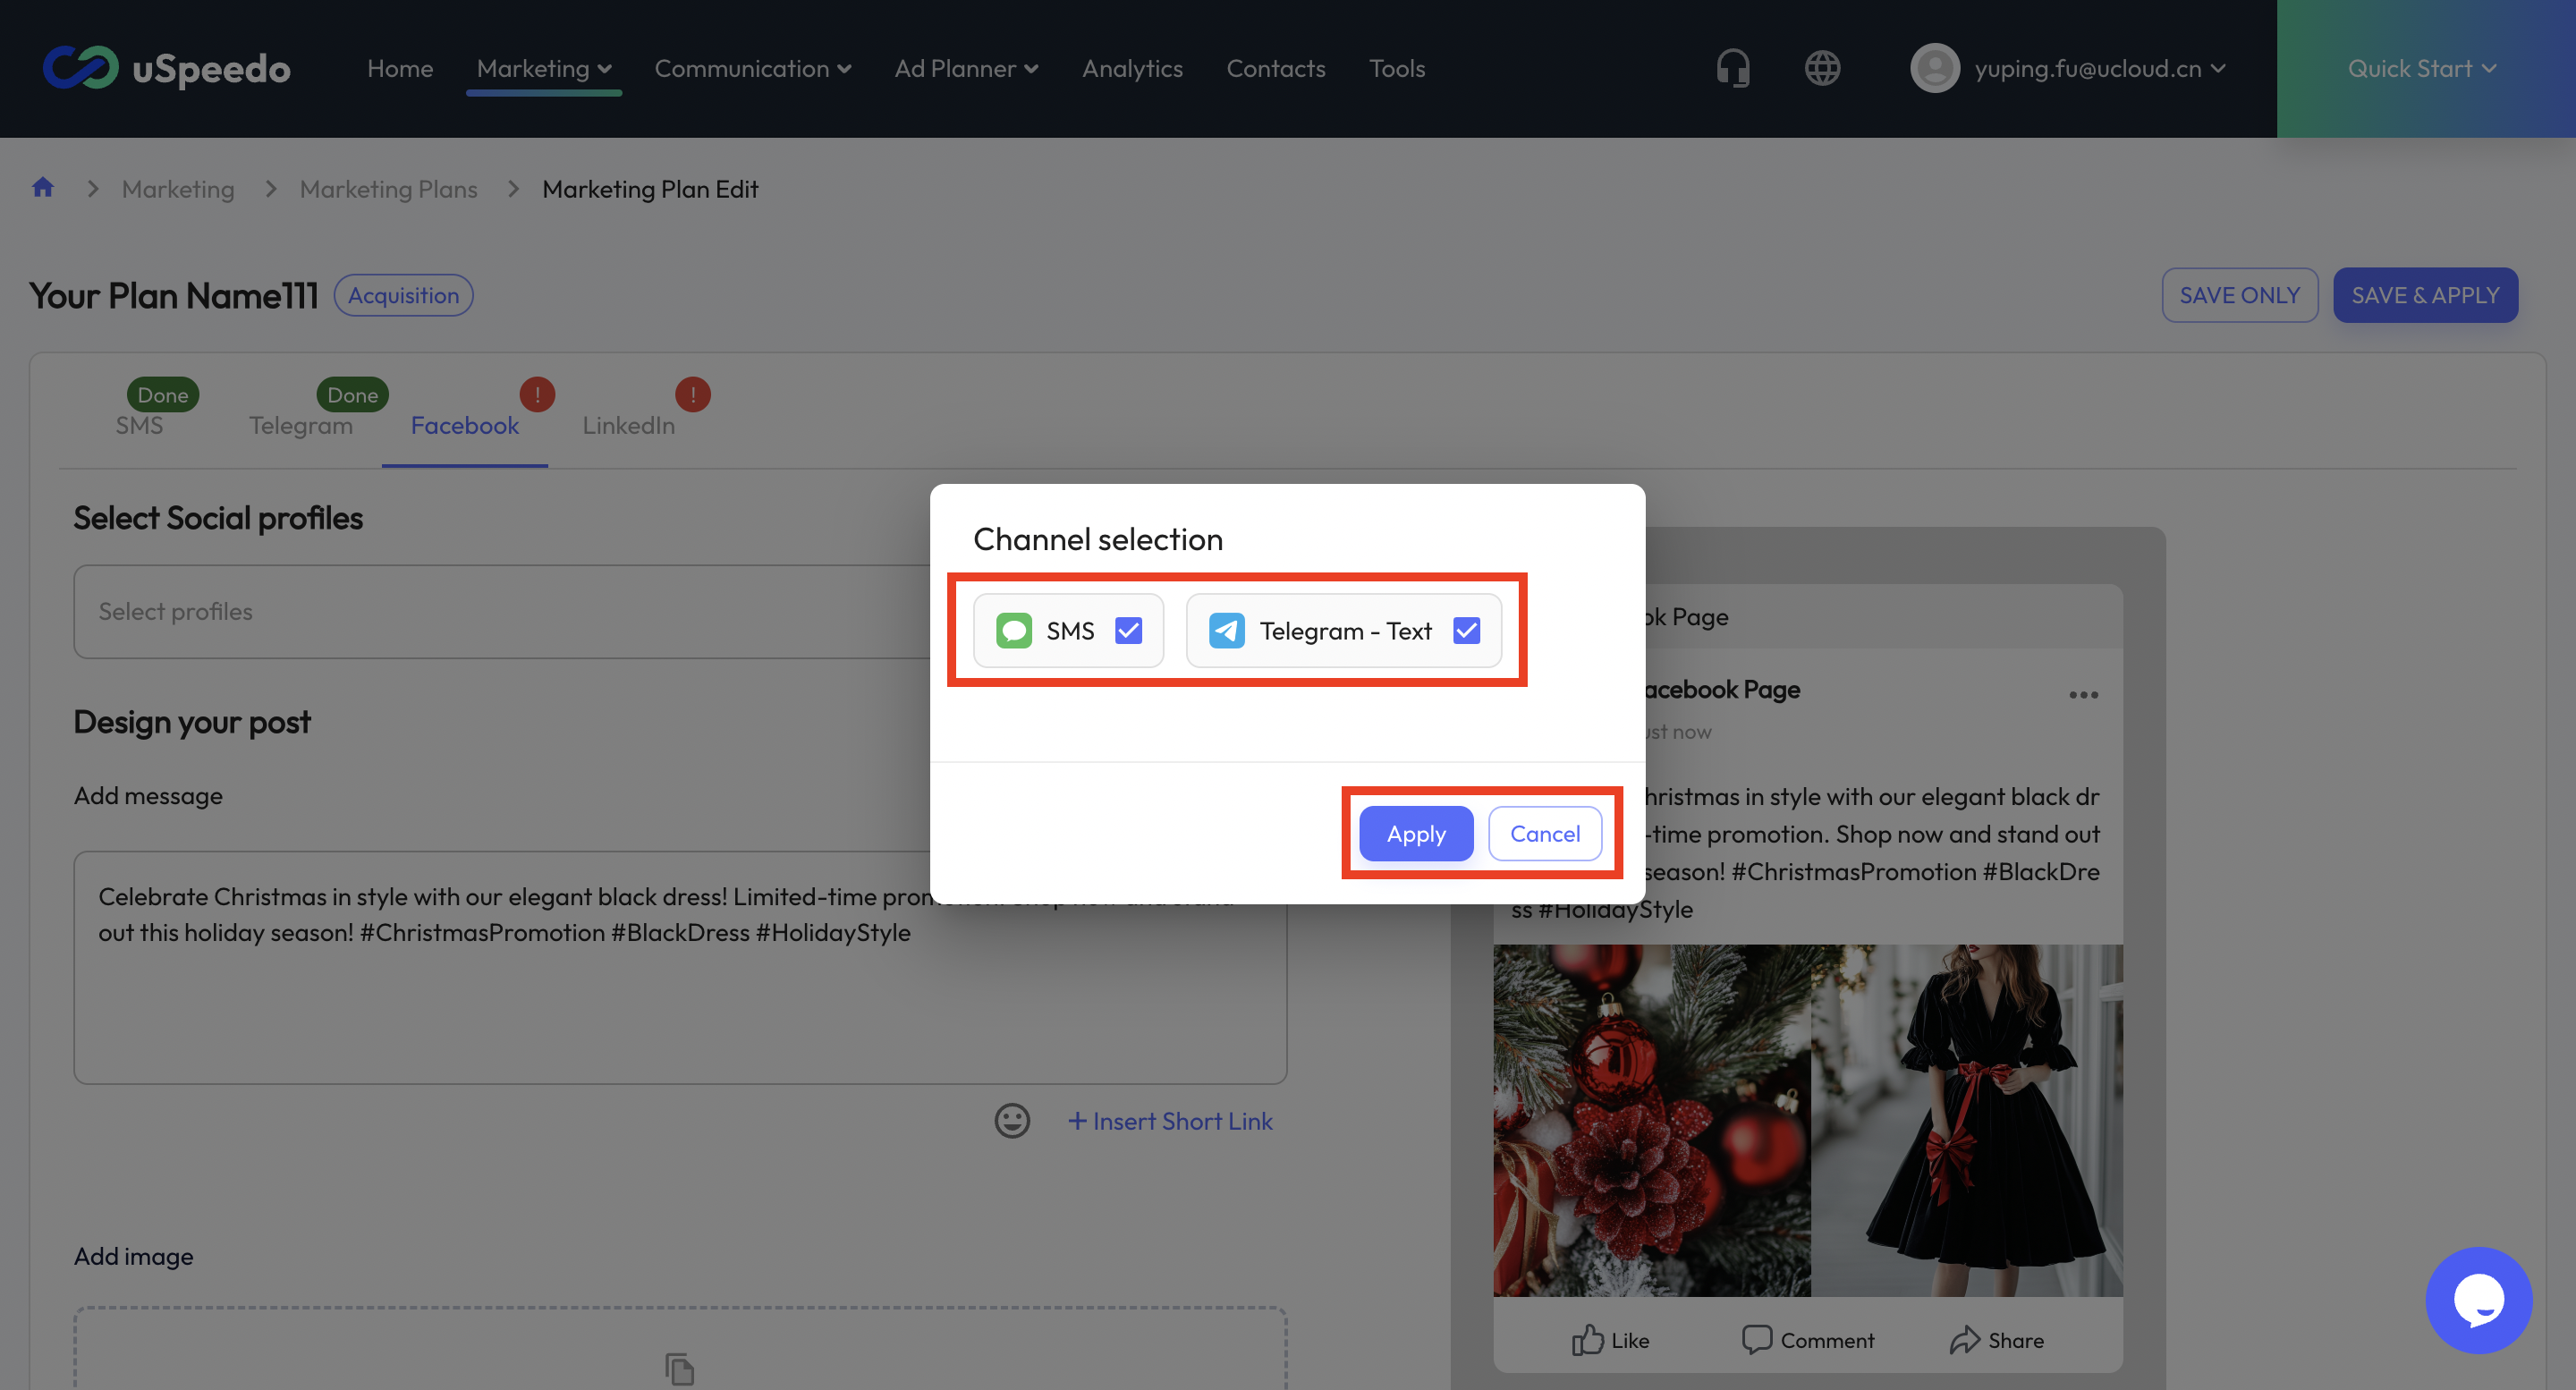
- Click “SAVE ONLY” to save the current plan and its details, which can be edited later from your plan list. Click “SAVE & APPLY” to confirm and apply the selected channels.
5. Save and View Plans
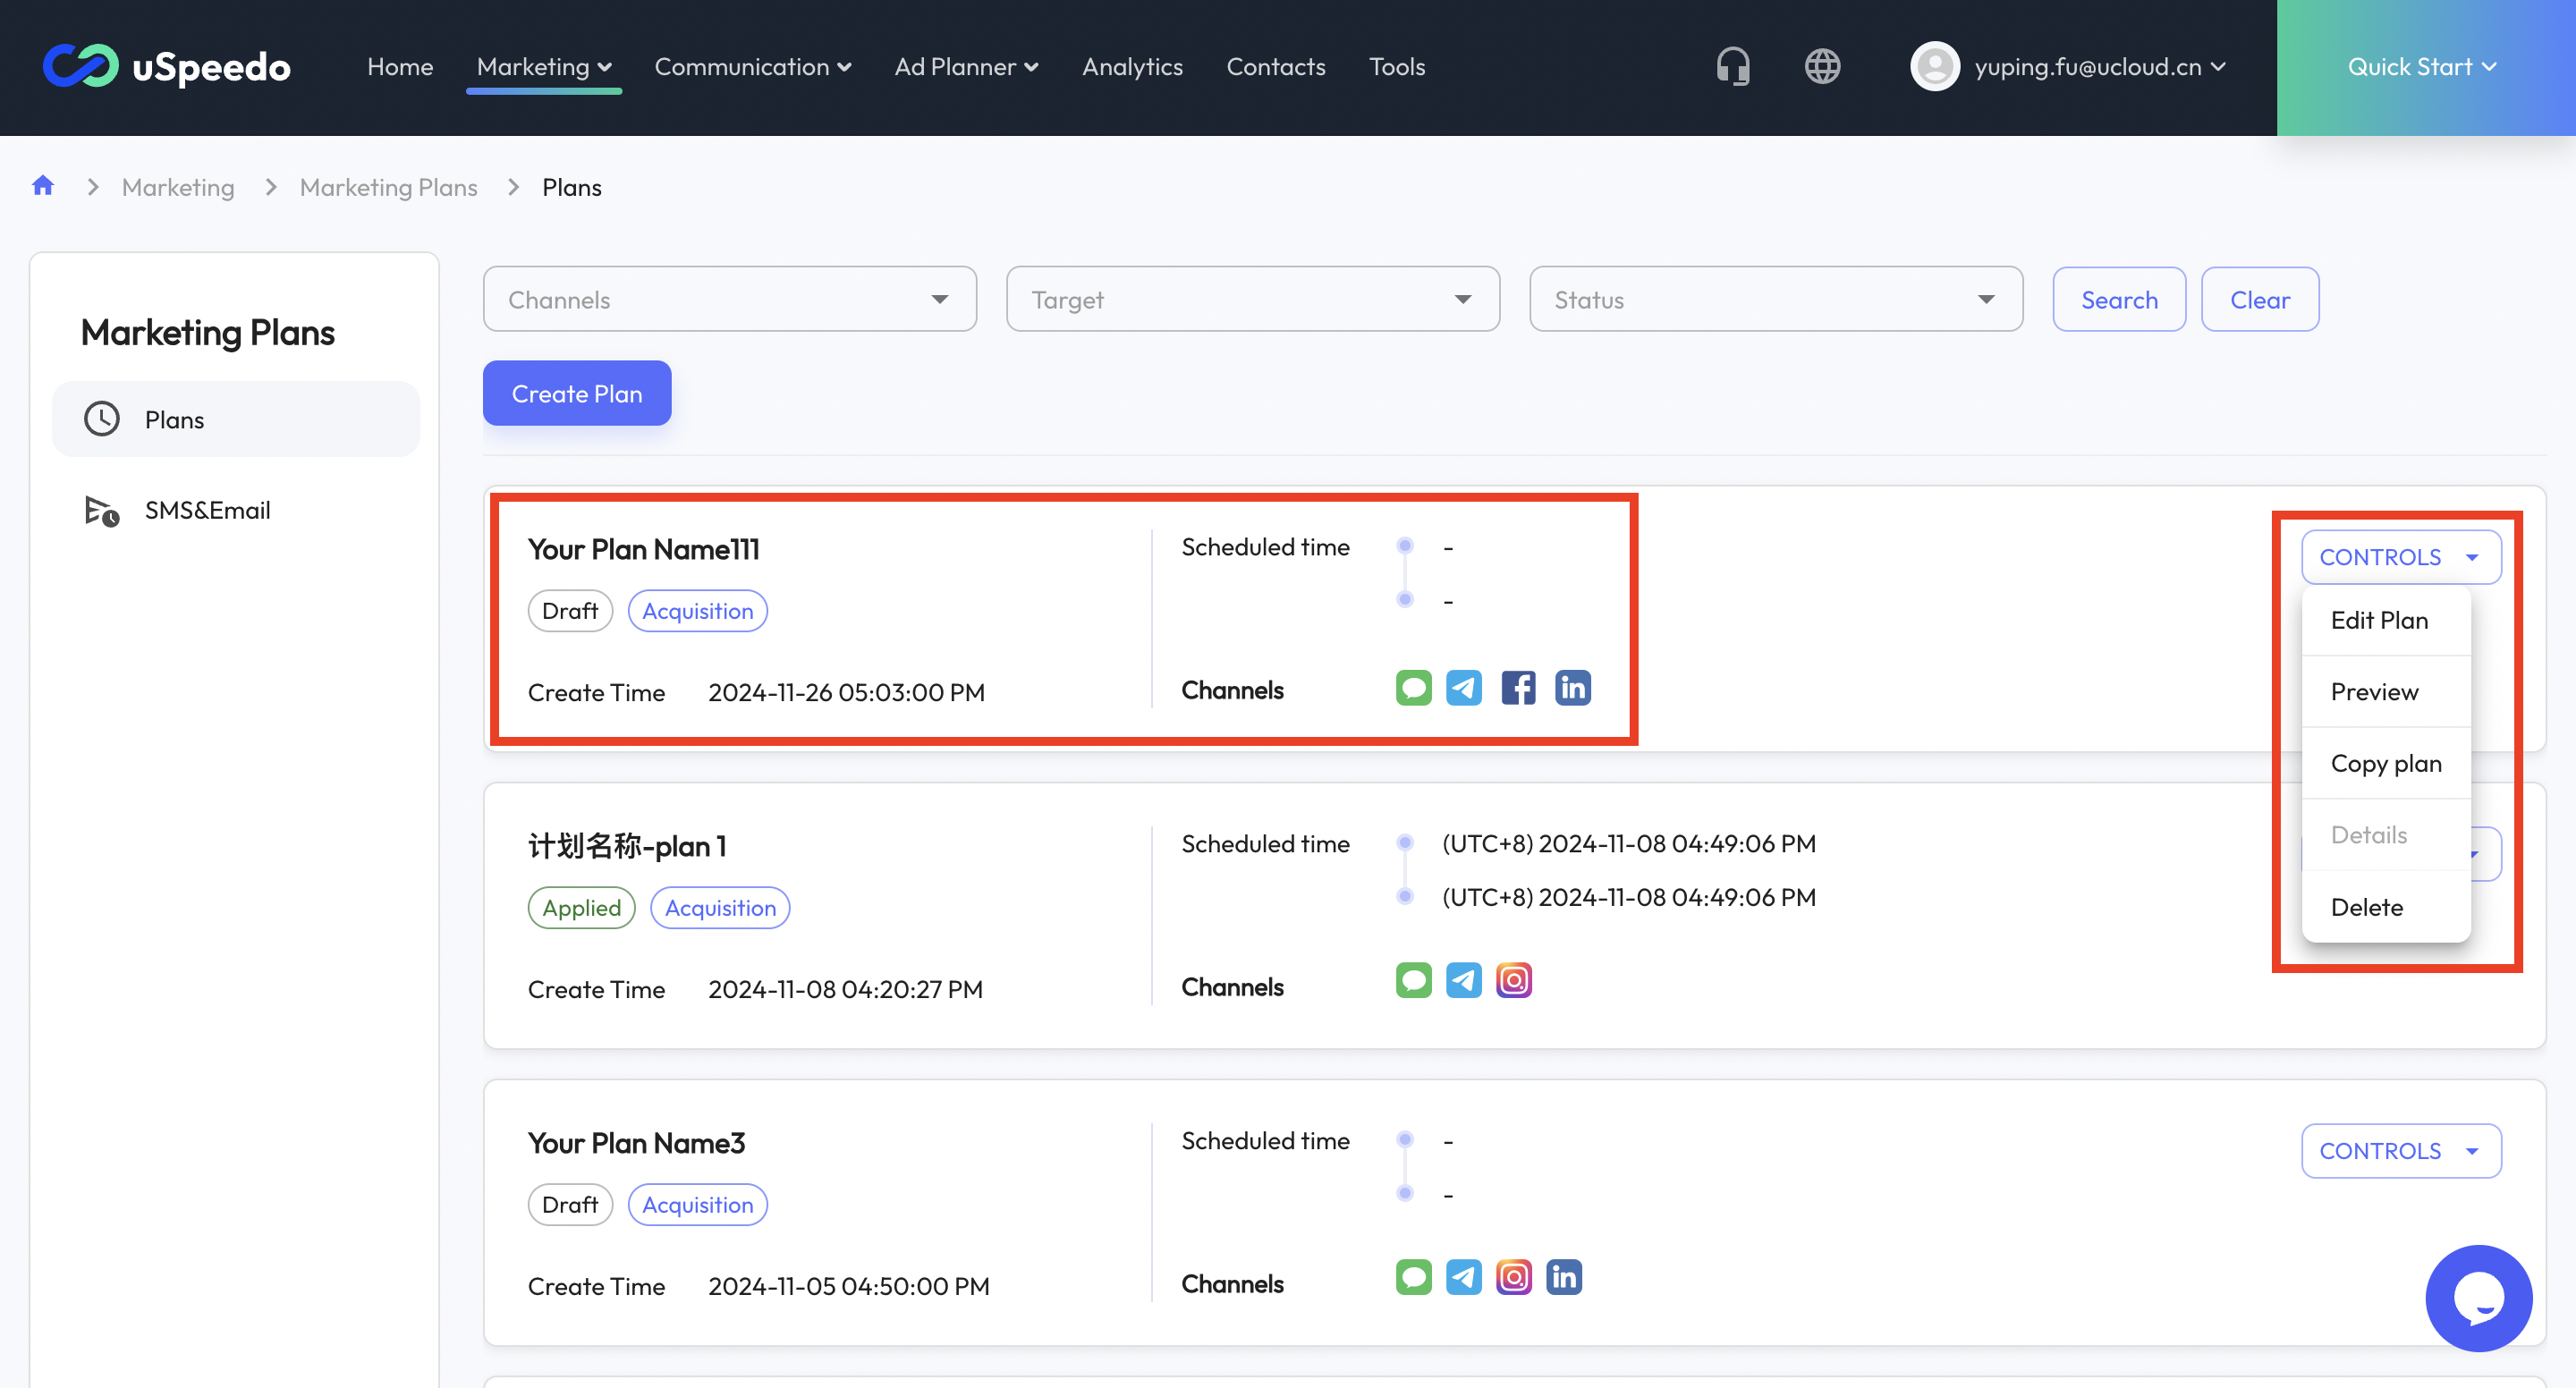
- Once all steps are completed, view all created plans in your plan list or filter using the dropdown for detailed searches.
- Plan details include:
- Plan status (Draft, Applied)
- Plan type (Acquisition, Activation)
- First task send time in the plan
- Last task send time in the plan
- All channels included in the plan
- Click “CONTROLS” for additional actions, including:
- Edit Plan: Only drafts can be edited.
- Preview: View all saved details of the plan.
- Copy Plan: Duplicate the plan, displayed as a new plan in the list.
- Details: View sending data related to the applied plan.
- Delete: Remove the plan, with a second confirmation prompt (this action cannot be undone).


6. View Plan Sending Data
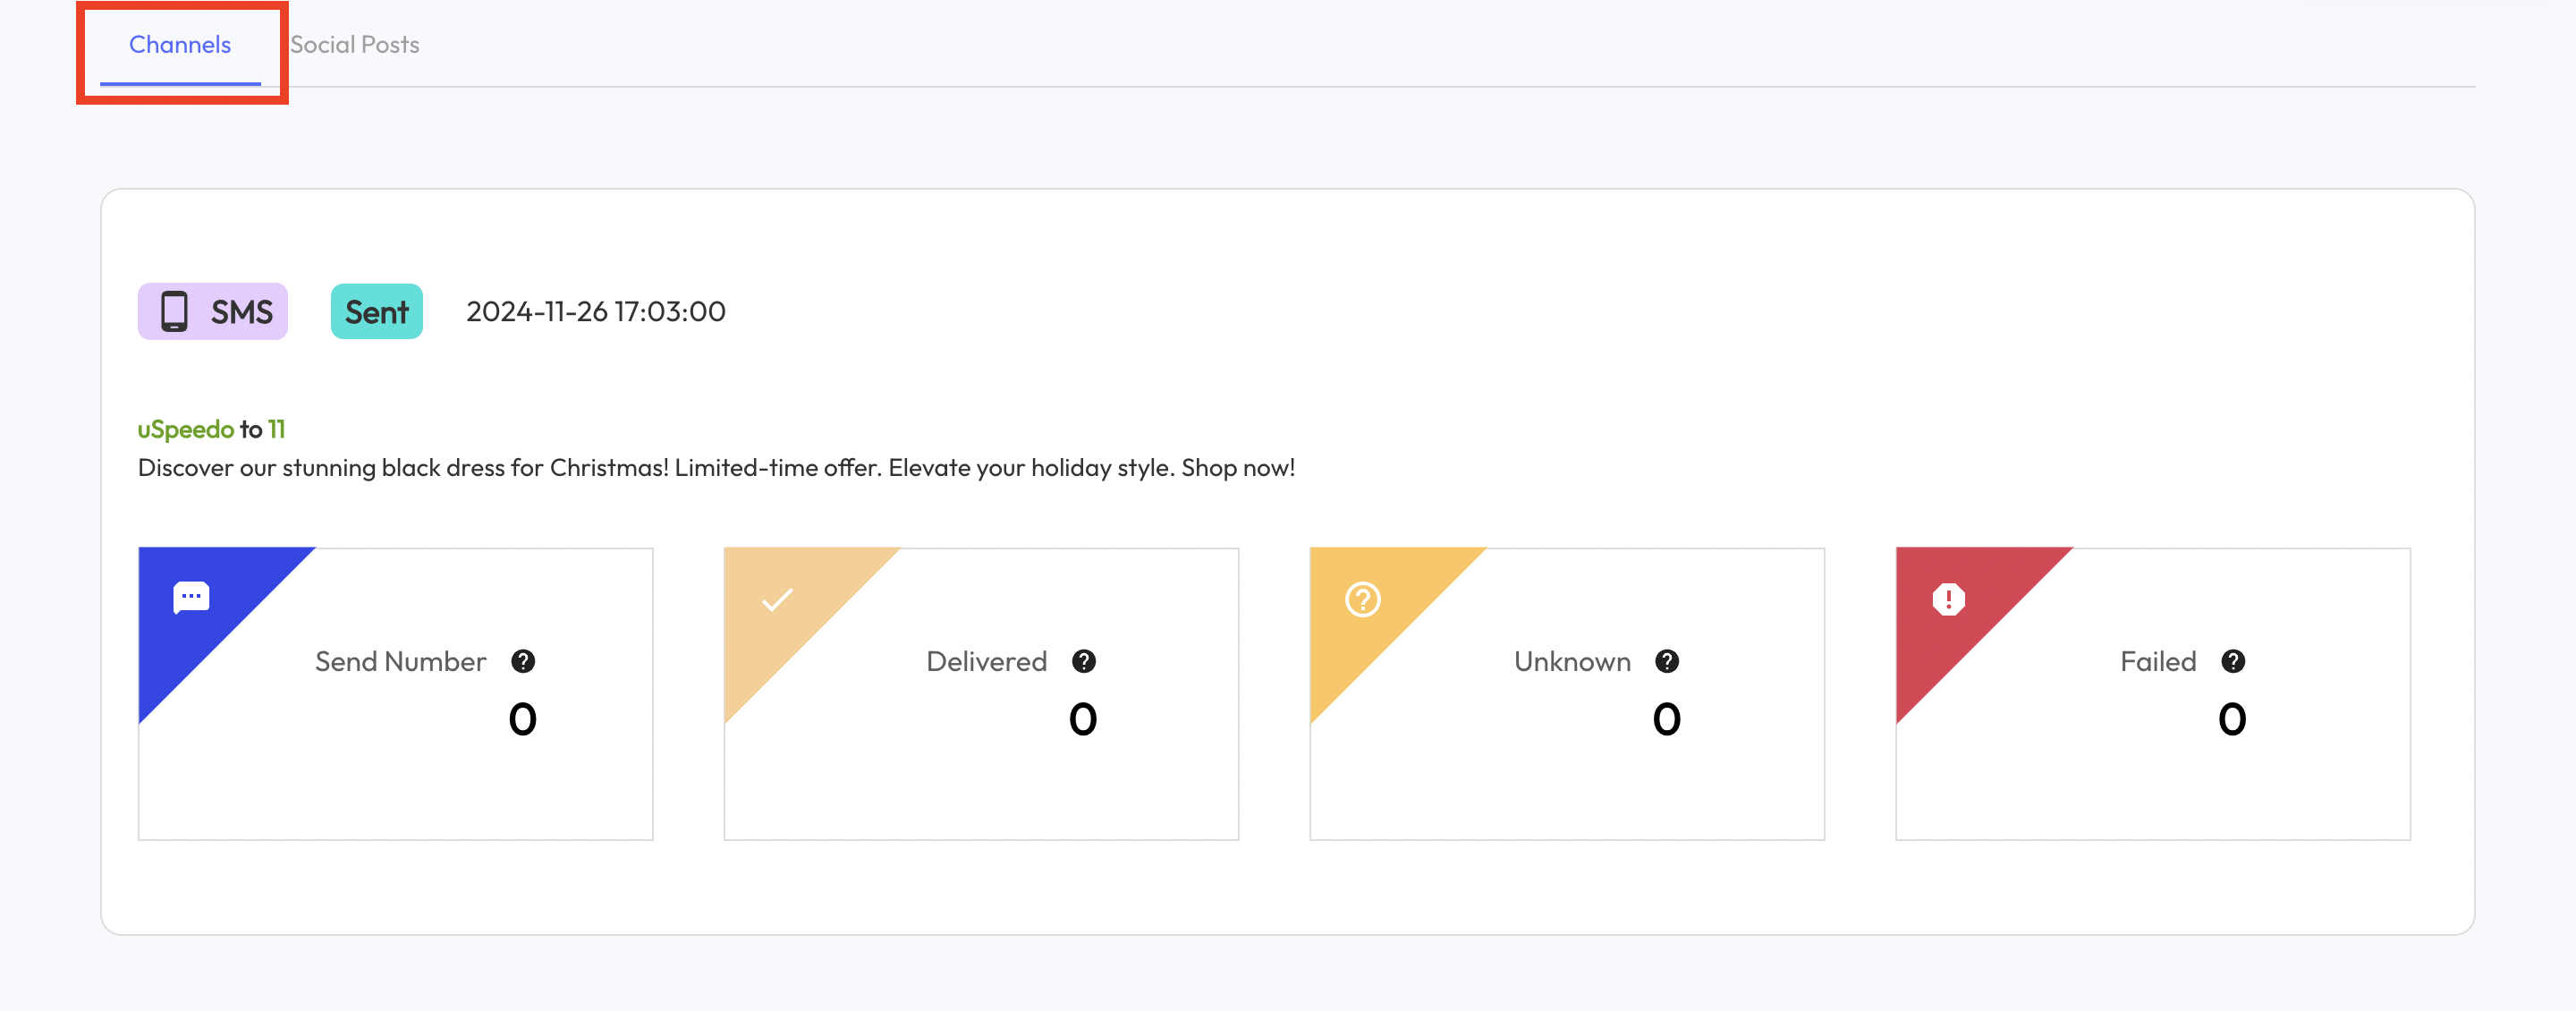
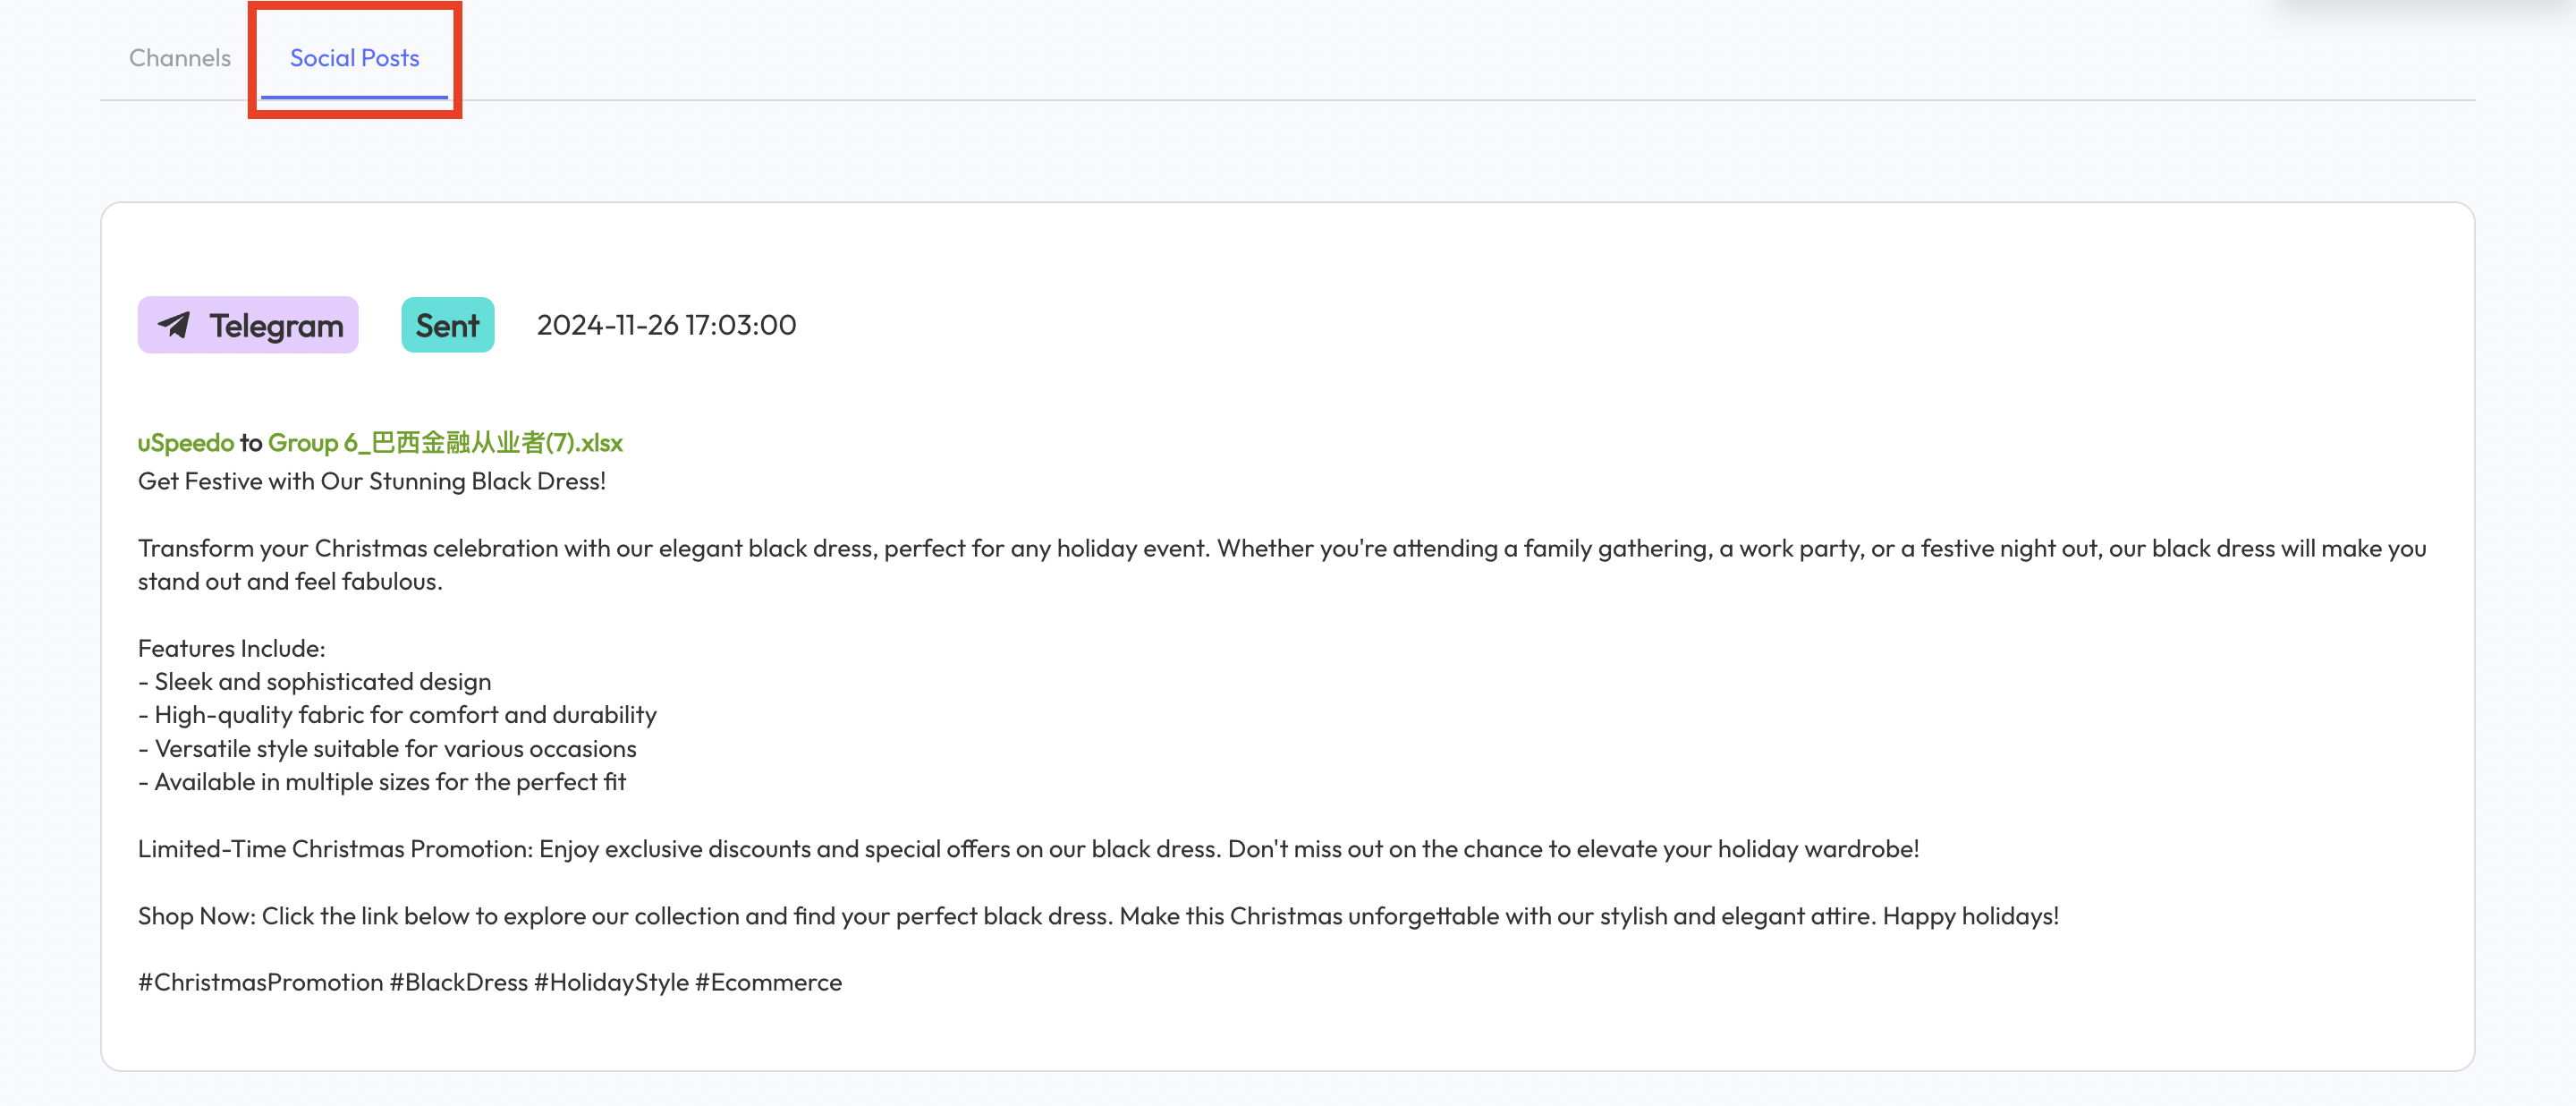
- After applying the plan, click "Details" to view sending data:
- The top section displays aggregate data for all selected channels post-sending. Unselected channels will display data as zero.
- Channels and social media posts are separated by tabs. The data dimensions for each channel vary and are available for viewing after the plan has been applied.
Additional Help
- Deploy the plan for effective and precise marketing campaigns. Adhere to this guide to amplify your marketing activities and reach your business objectives.
- If you need further assistance or have any questions:
- Contact support@uspeedo.com
- Submit a Ticket for a detailed response from uSpeedo.