Guide for Using the SMS Sending Page
On the SMS Sending page, you can easily create and send SMS messages. Below is a detailed overview of the layout and functionalities of the page:
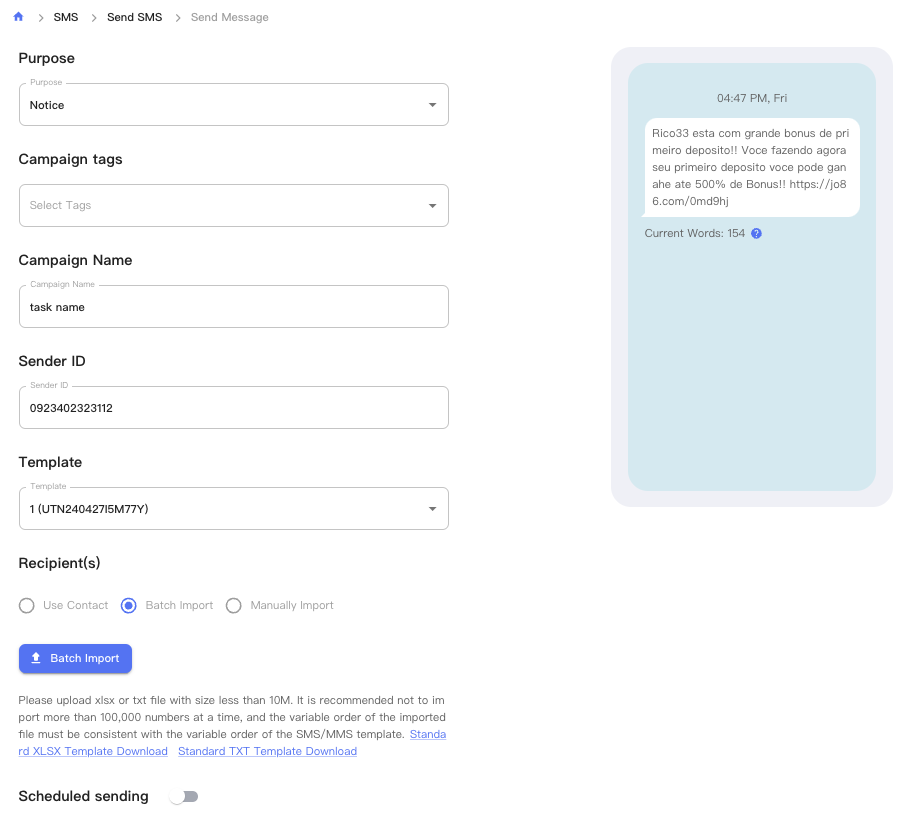
1. Type
Select the type of SMS in this field. Currently available type: "Notice".
- Notice
- Verification code
- Marketing
2. Task Tags
Optional. Add tags to the task for classification and management. Click the field to select or enter tags.
3. Task Name
Enter the task name in this field for easy management and search. This field is required.
4. Sender ID
Enter the sender ID. The sender ID identifies the sender of the SMS.
5. SMS Template
Select a pre-created SMS template. Click this field to choose a template from the dropdown menu.
6. Recipients
Choose the recipients of the SMS. There are several options:
- Select Contacts: Choose from the contact list.
- Import File: Upload a file containing recipient information (supports XLSX and TXT formats).
- Add Manually: Directly enter the recipient's phone numbers.
7. Scheduled Sending
Turn on this switch to schedule the SMS send time. If turned off, the SMS will be sent immediately.
8. Submit
Click the "Submit" button at the bottom of the page to save and send the SMS. Ensure to check all inputs for accuracy before clicking.
Example Procedure
- Select "Notice" in the "Type" field.
- Enter task tags (if needed).
- Enter a task name in the "Task Name" field, e.g., "New Year Greetings".
- Enter the sender ID.
- Select an SMS template.
- Choose the recipients, either by importing a file or adding manually.
- If scheduling is needed, turn on the scheduled sending switch and set the time.
- Click the "Submit" button to save and send the SMS.
This is a detailed guide on how to use the SMS sending page. Follow these steps to easily create and send SMS tasks.