Create and send an email campaign
Overview
An email campaign allows you to send a structured message to one or multiple recipients at the same time. In uSpeedo, you can create a campaign, design your email, choose recipients, and send it immediately or schedule it for later.
This guide walks you through the entire process — from preparing your account to sending your first campaign and tracking the results.
Before You Start
Make sure the following requirements are met before creating a campaign:
You have created an account in the Console.
Your account has available balance or email sending quota.
Follow the sender requirements from Gmail and Yahoo.
Your recipients are ready:
- You can import them in Contacts, or
- Add recipients directly when creating the campaign
If you plan to send emails in large volumes, it is strongly recommended that you authenticate your own sending domain (see the domain authentication guide).
Step 1: Create a Campaign
Go to Send Email → Create Campaign.
- Alternatively, you can go to Templates and start a campaign from a template.
Enter a Campaign Name.
- This name is only visible to you and helps you find the campaign later.
- It will not appear in the email received by recipients.
Click Create to continue.
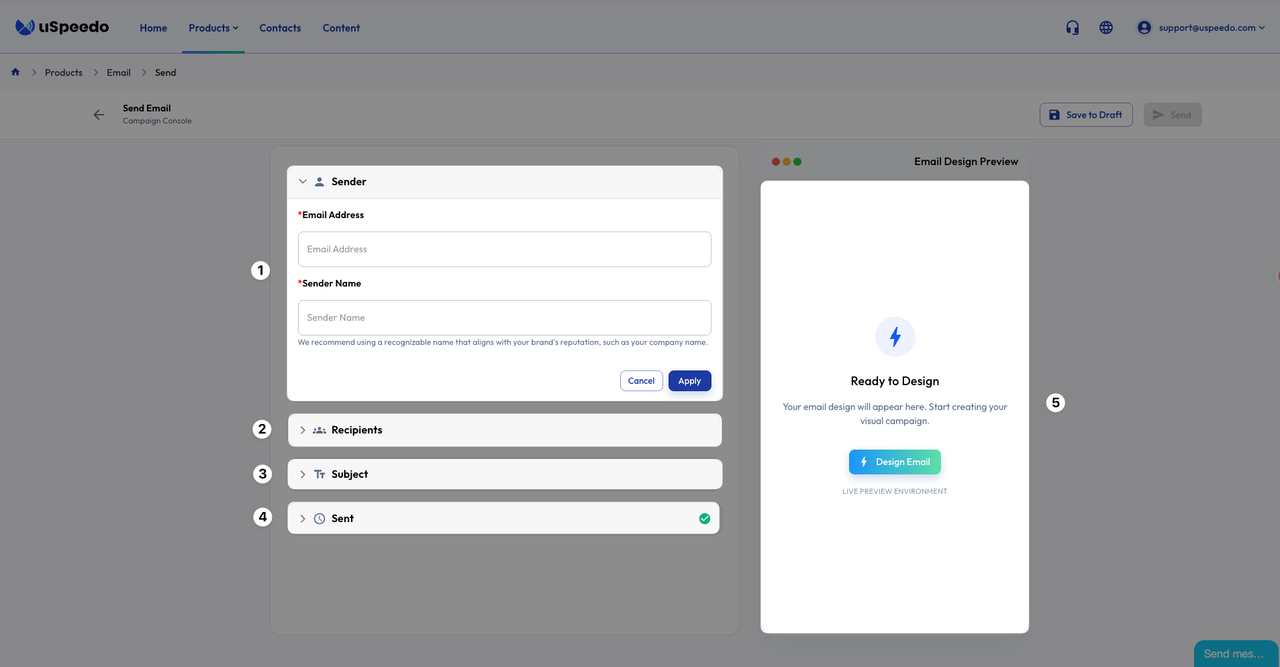
Step 2: Set Up Basic Information
Inside the campaign page, complete the following fields:
- Sender – the email address that will send the message, and the sender name that appears when the messages are sent
- Recipients – choose contacts, download the Excel template and upload it in bulk, or add email addresses directly
- Subject – the subject line recipients will see , and the preheader text that follows the subject line when viewed in an inbox
- Send Time – send immediately or schedule for later
Once everything or part of them is filled in, click Design Email on the right side.
Step 3: Design Your Email
You can choose the editing method that fits your needs:
Option 1: Start from Scratch
- Start from a blank canvas. Best if you want full control over the design.
Option 2: Use a ready-made template (recommended for beginners)
- Browse uSpeedo’s built-in templates
- Choose one you like and click Use Template
- The template will open in the drag-and-drop editor
Option 3: Use the HTML editor
- Use this if you already have an HTML email template
- Or if you are comfortable editing code
After finishing your design:
- Click Save & Proceed to Setup
- Review your campaign setup information
- If everything looks correct, click Send
Your campaign will now begin sending on time.
How to Check Your Inbox
When the campaign status changes to Completed, you can check your inbox to confirm the email was delivered.
💡 If you don’t see the email in the main inbox:
- Check the Spam folder
- Check the Promotions tab (for Gmail users)
- If it appears in spam, move it to the inbox — this helps improve future deliverability
Email placement may be affected by:
- Your sending IP configuration
- Your domain authentication
- Your sender reputation
For more guidance, see: How to Improve Email Deliverability
Track Campaign Performance
After sending, you can monitor performance in Statistics.
You will be able to see:
- Delivery status
- Sending progress
- Other sending-related metrics
This helps you understand whether your emails were successfully delivered and how your campaigns are performing.
Tips & Best Practices
- Verify your domain before sending large campaigns
- Always test the email by sending it to yourself first
- Use a clear and relevant subject line
- Avoid sending large volumes from a new domain too quickly
- If your email goes to spam often, improve your domain and sender reputation before sending again